In my previous article IaC ARM Templates with Azure Pipelines I showed creating a Azure Pipeline Release and YAML multi-stage pipeline. In this article I am going to show using Ansible to deploy IaC to Azure using Azure Pipelines.
The Ansible Playbook used for this example can be found on GitHub.
As I covered creating piplelines in the previous article I will skip some of those steps and show the steps needed for Ansible and again show a multi-stage pipleline in YAML.
Azure Pipelines – Releases
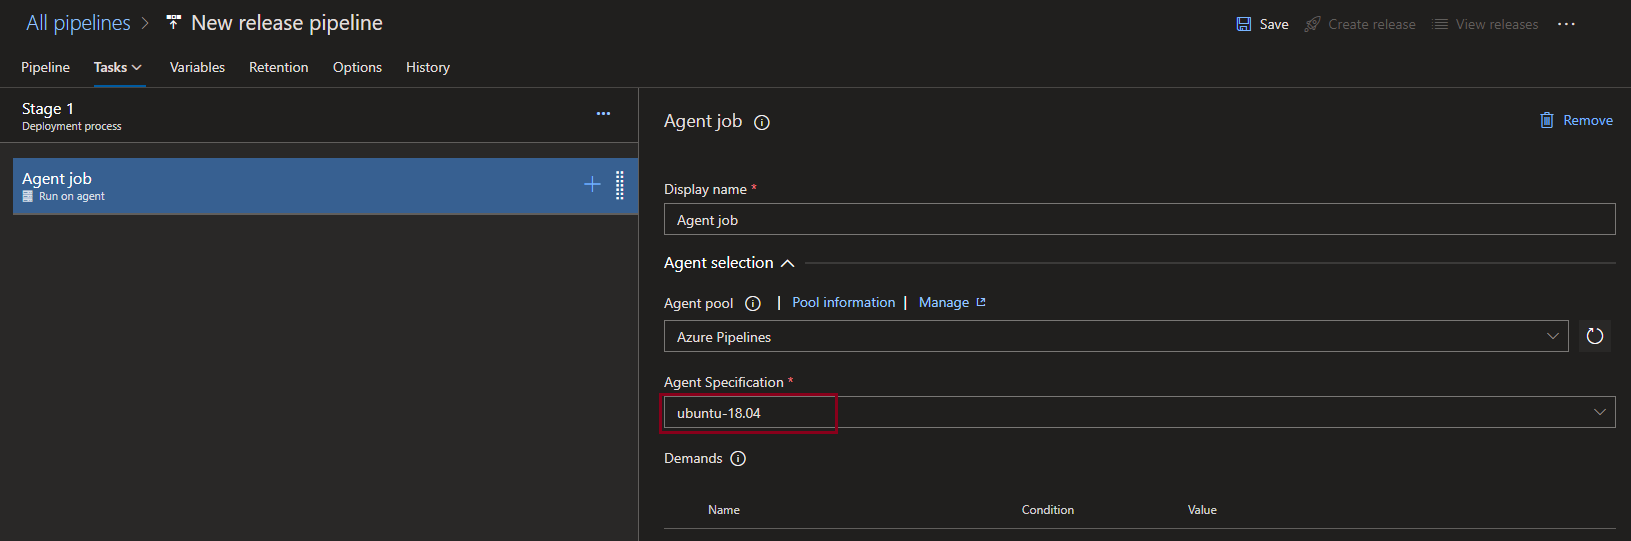
For deploying ARM templates I left the defaults for the agent, this time I am going to change the Agent Specification to use Ubuntu.
The first thing I am going to add to the pipleline is Azure CLI.
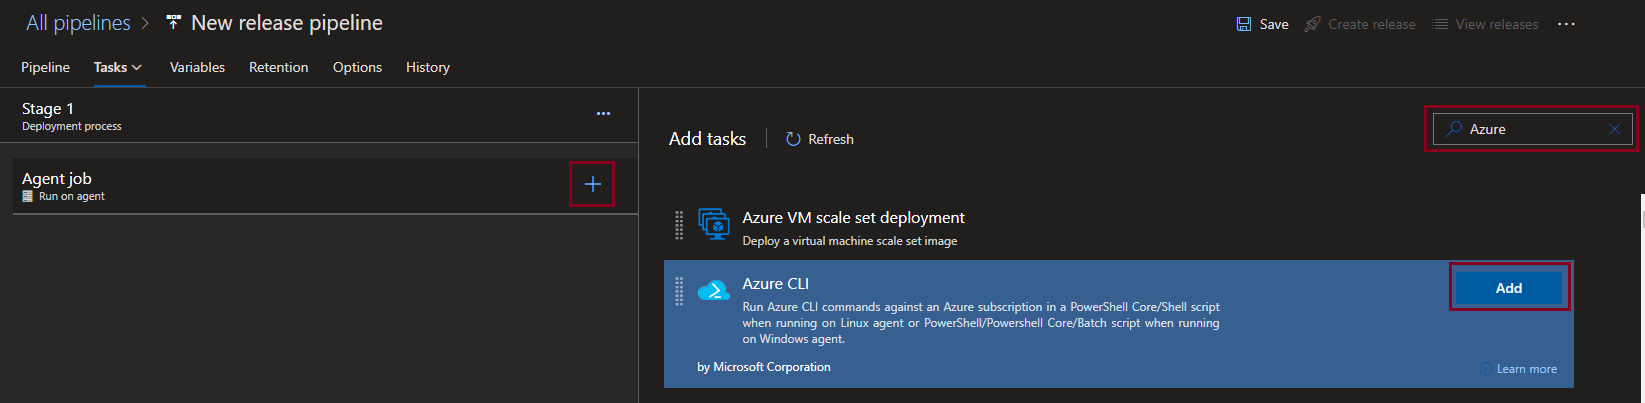
The purpose of the CLI step is to get the Azure connection details to supply to Ansible in order to be able to deploy to Azure.
I’ve used an inline script to configure some Azure Pipeline variables on the fly from the CLI response. For this to work the “Access service principle details in script” must be selected.

echo "##vso[task.setvariable variable=ARM_SUBSCRIPTION_ID]$(az account show --query="id" -o tsv)"
echo "##vso[task.setvariable variable=ARM_CLIENT_ID]$servicePrincipalId"
echo "##vso[task.setvariable variable=ARM_CLIENT_SECRET]$servicePrincipalKey"
echo "##vso[task.setvariable variable=ARM_TENANT_ID]$tenantId"
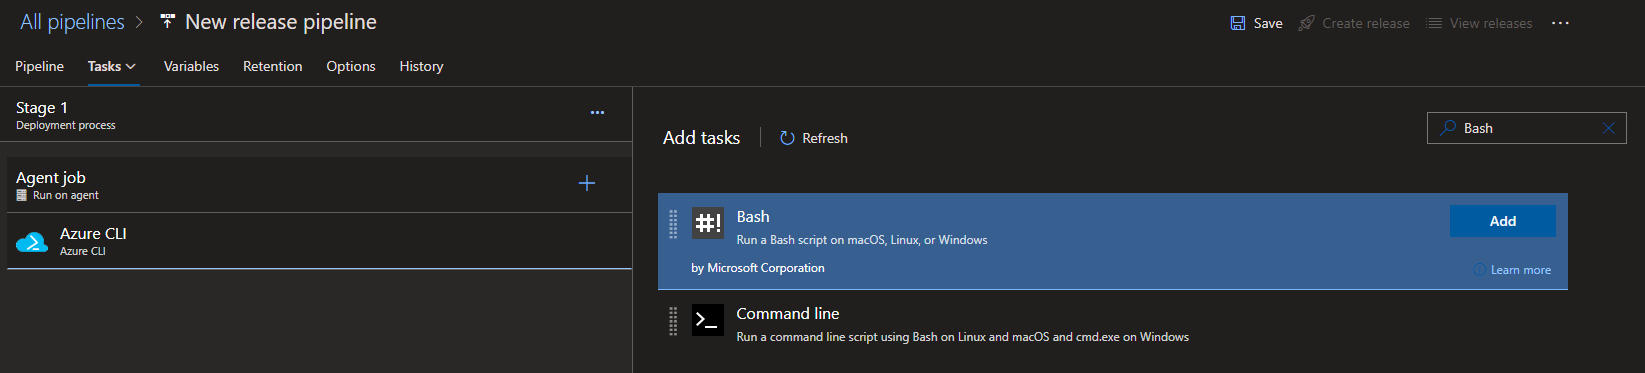
As this is running on a hosted agent Ansible needs installing.
Ansible can use environment variables, a credentials file or have the variables defined in the playbook. As we want to keep secrets out of playbooks the others are preferred. For some reason the environment variable approach does not work using the Ansible Task but creating the credential file works for either the Ansible or Bash tasks.
On the hosted agent the credential file is either blank or doesn’t exist so we need to create/update it using the variables created in the Azure CLI step. Once this has been updated we can then install Ansible with Azure modules.
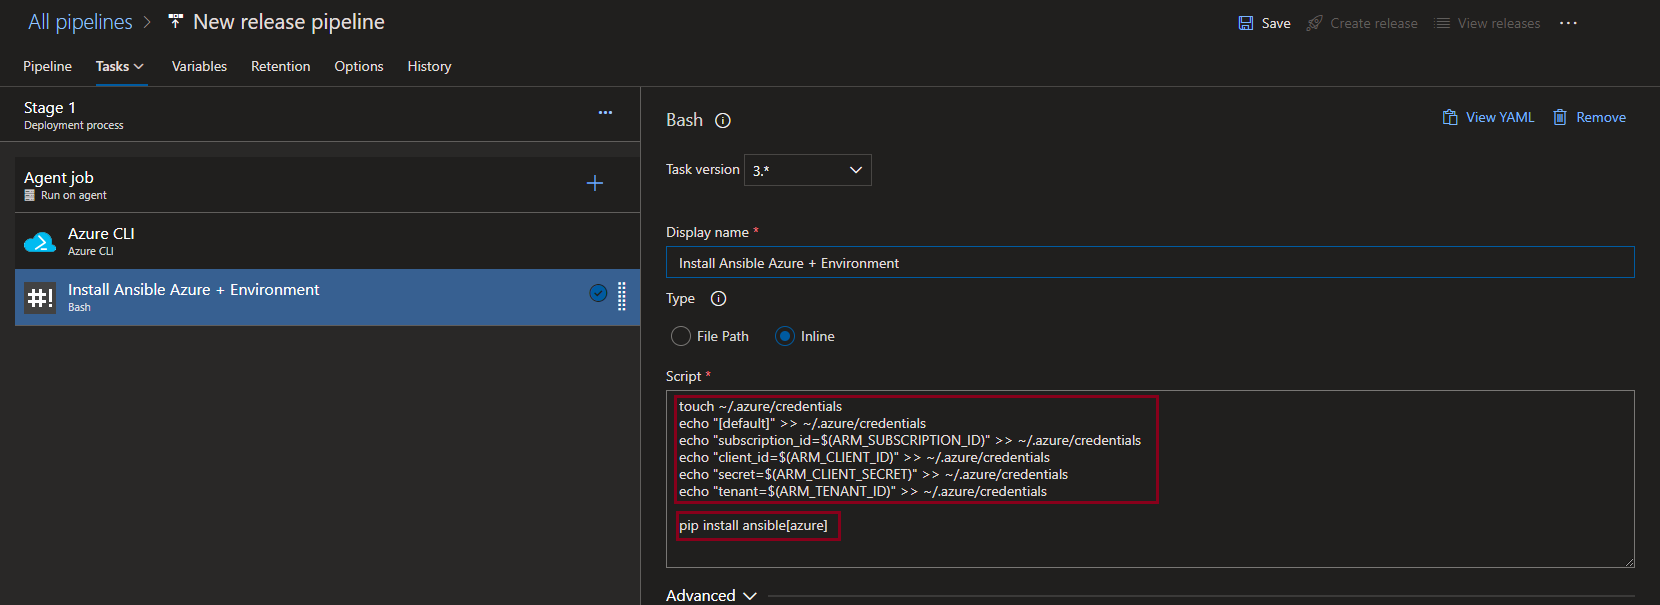
touch ~/.azure/credentials
echo "[default]" >> ~/.azure/credentials
echo "subscription_id=$(ARM_SUBSCRIPTION_ID)" >> ~/.azure/credentials
echo "client_id=$(ARM_CLIENT_ID)" >> ~/.azure/credentials
echo "secret=$(ARM_CLIENT_SECRET)" >> ~/.azure/credentials
echo "tenant=$(ARM_TENANT_ID)" >> ~/.azure/credentials

pip install ansible[azure]
Now Ansible is installed on the agent, I can execute a simple playbook. As with the ARM template example I am going to deploy a storage account into a resource group, both of which are created by the playbook.

ansible-playbook $(System.DefaultWorkingDirectory)/_codingwithtaz/azure/storage/storage.yml --extra-vars "storage_name=$(storageName) storage_resource_group=$(storageGroup) storage_location=$(storageLocation)"
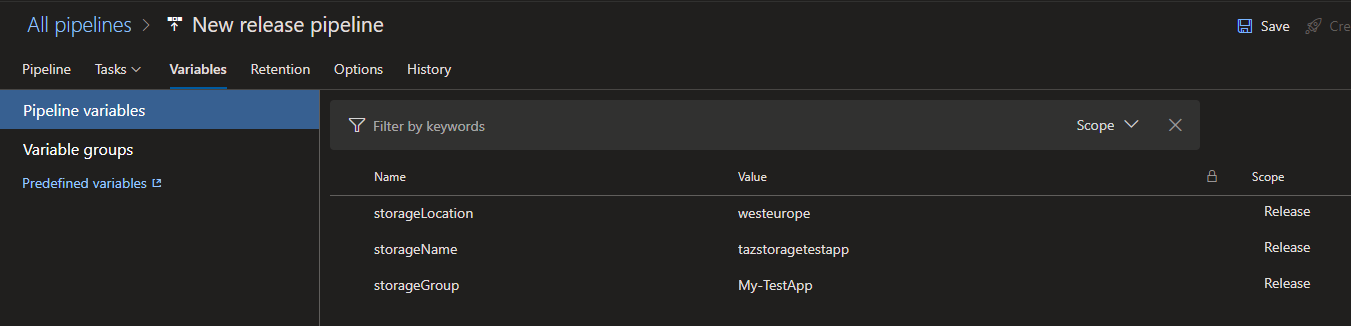
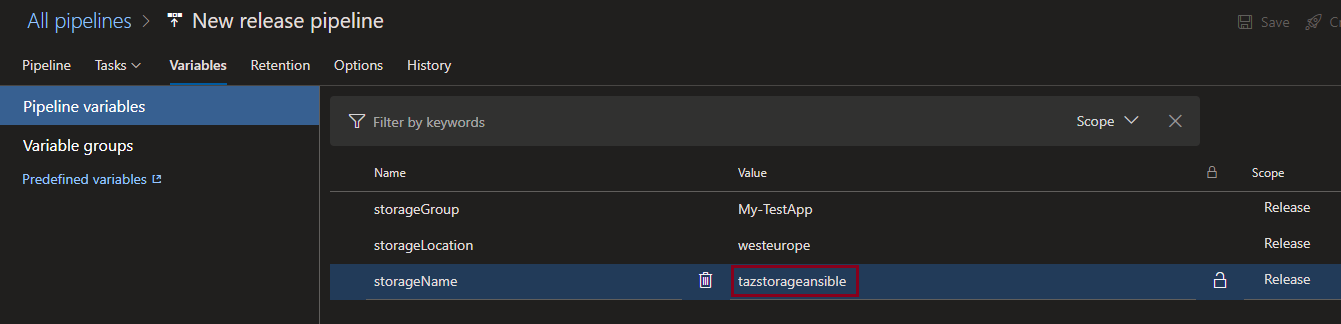
There are some variables that setting up for this to provide the playbook with the required values for the storage account.
That is all that is needed to run the playbook, let’s see if our pipeline works.
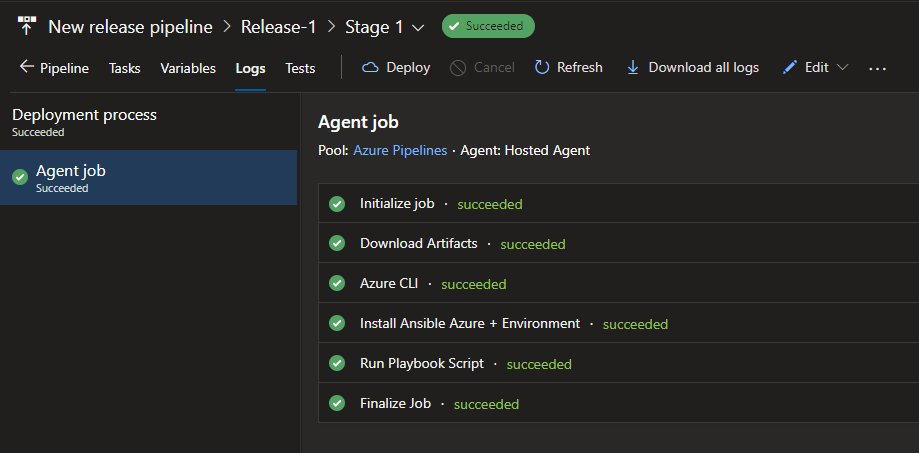
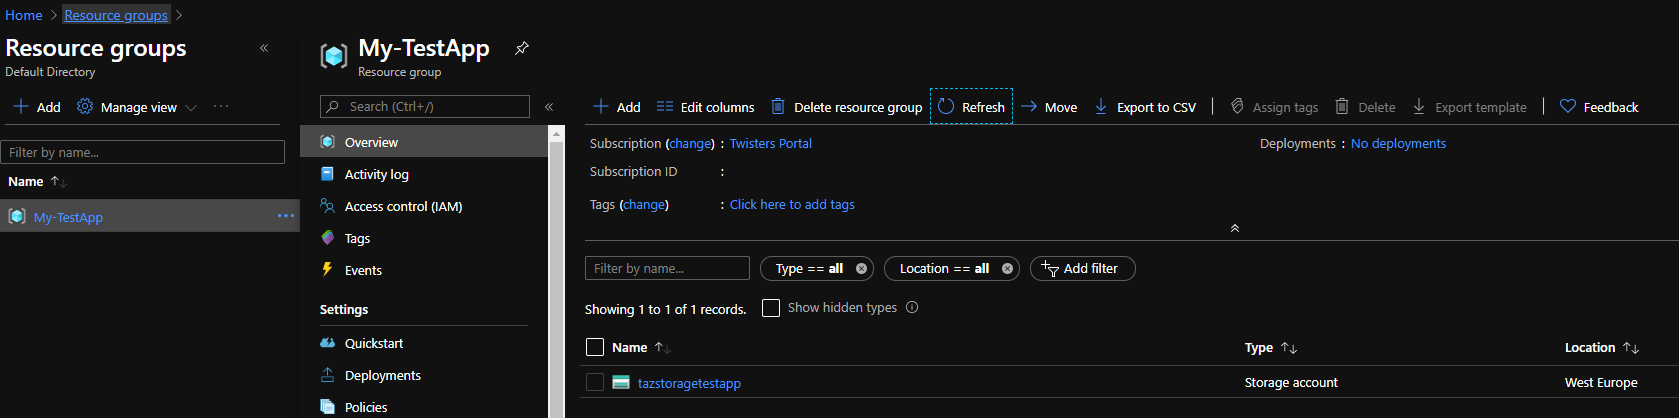
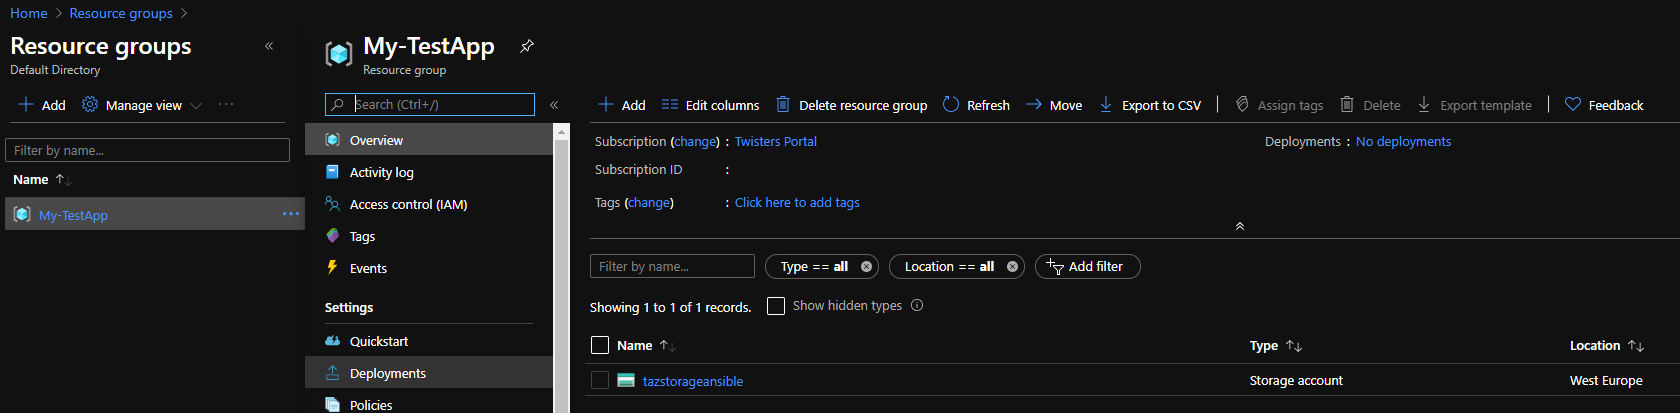
And in Azure, it looks like the account and resource group were created as expected.
There is an alternative to running the Ansible Playbook using a script, there is a Microsoft Ansible Task. I will add this task and remove the script.

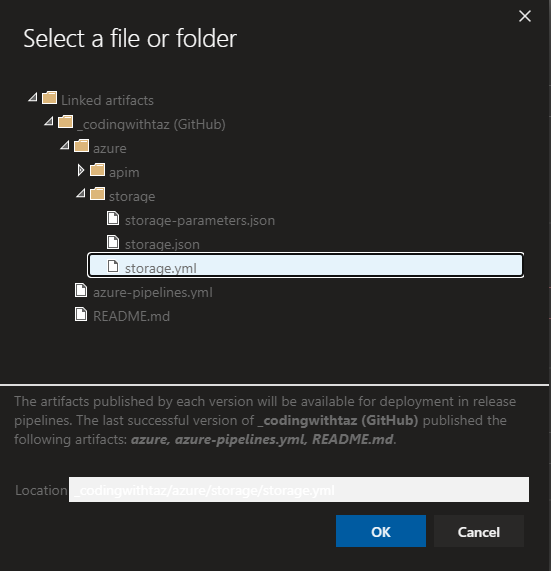
Now I need to select the playbook for the release.
Select the playbook file from the linked GitHub artifacts.
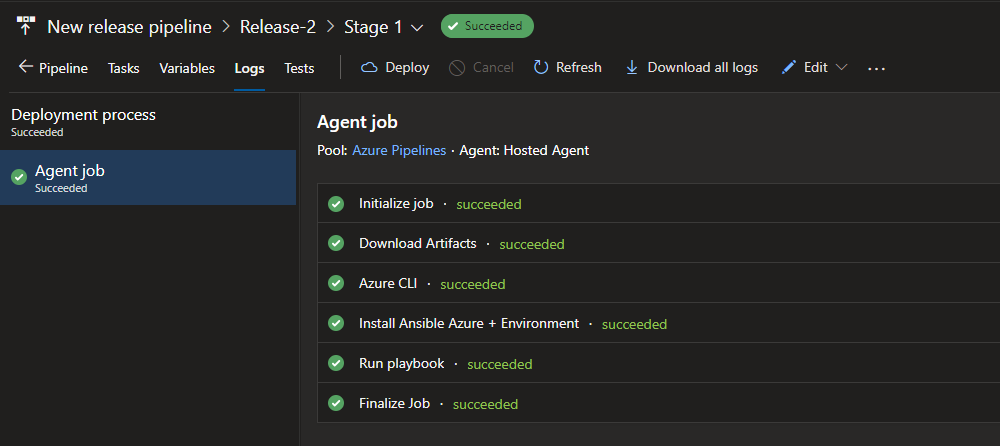
Now we can see the completed task, for this run I am using the agent machine which is configured as a hosted agent but this could be a private agent you have setup.

--extra-vars "storage_name=$(storageName) storage_resource_group=$(storageGroup) storage_location=$(storageLocation)"
Let’s change the storage account name.
Now, let’s try and run the pipeline again and see if it works.
And in Azure the storage account was created and with the new name.
Ansible Task
You may have noticed when configuring the Ansible task that for the Ansible location there are two settings “Agent machine” and “Remote machine”. The “Remote machine” can be a Virtual Machine you have already setup for running your Ansible scripts and want to use that. I am not going to go into setting this up but it’s worth noting that the task supports this.
For more information on this extension see the Marketplace.
Azure Pipelines YAML
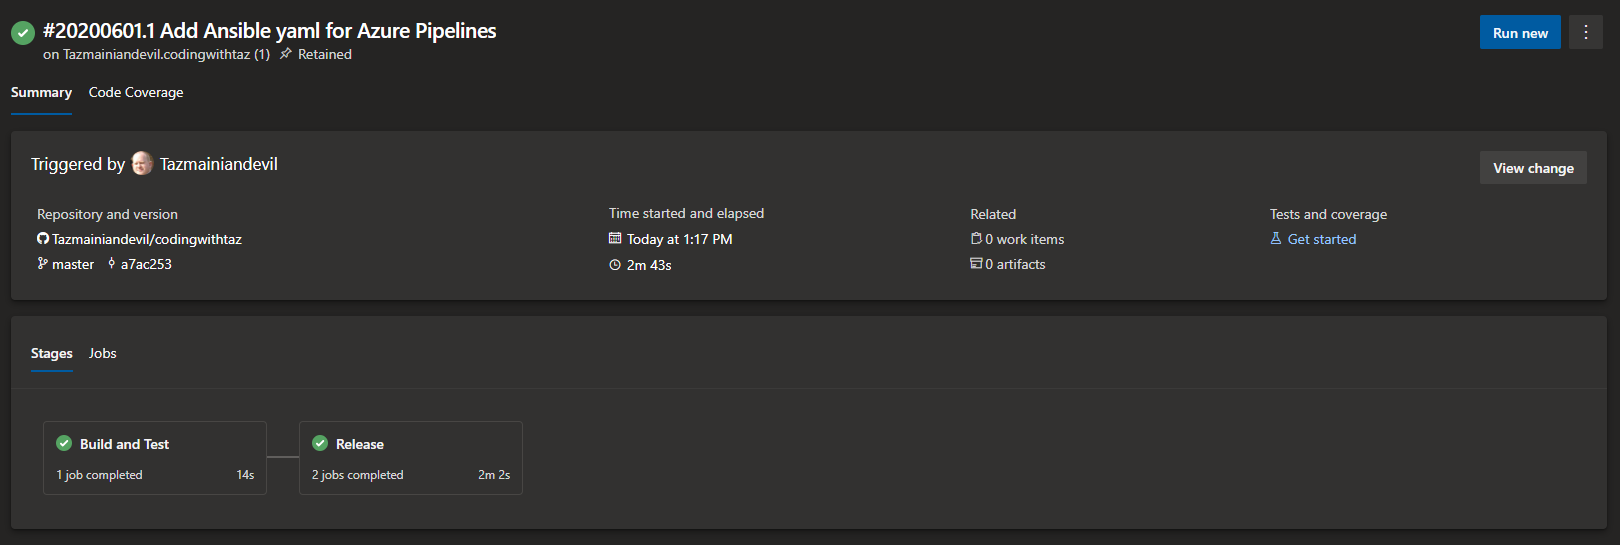
The previous article goes into detail about creating the pipeline via the Azure DevOps portal, so here I will just include the YAML for both Ansible deployment variants. Both examples show a multi-stage and multi-job pipeline.
YAML code for the pipeline can be found on GitHub.
# A pipeline with no CI trigger
trigger: none

# No PR triggers
pr: none

stages:
- stage: build_test
  displayName: Build and Test
  jobs:
  - job: build_test
    pool:
      vmImage: 'windows-latest' # Currently Windows 2019 and Visual Studio 2019
    steps:
    - script: echo Code Built and Tested!

- stage: release
  displayName: Release
  dependsOn: build_test
  jobs:
   - job: deploy_ansible
     pool:
       vmImage: 'ubuntu-latest' # Currently Ubuntu 18.04
     steps:
      - task: AzureCLI@2
        displayName: 'Azure CLI '
        inputs:
          azureSubscription: 'Twisters Portal'
          scriptType: bash
          scriptLocation: inlineScript
          inlineScript: |
            echo "##vso[task.setvariable variable=ARM_SUBSCRIPTION_ID]$(az account show --query="id" -o tsv)"
            echo "##vso[task.setvariable variable=ARM_CLIENT_ID]$servicePrincipalId"
            echo "##vso[task.setvariable variable=ARM_CLIENT_SECRET]$servicePrincipalKey"
            echo "##vso[task.setvariable variable=ARM_TENANT_ID]$tenantId"
          addSpnToEnvironment: true

      - bash: |
          touch ~/.azure/credentials
          echo "[default]" >> ~/.azure/credentials
          echo "subscription_id=$(ARM_SUBSCRIPTION_ID)" >> ~/.azure/credentials
          echo "client_id=$(ARM_CLIENT_ID)" >> ~/.azure/credentials
          echo "secret=$(ARM_CLIENT_SECRET)" >> ~/.azure/credentials
          echo "tenant=$(ARM_TENANT_ID)" >> ~/.azure/credentials

          pip install ansible[azure]
        displayName: 'Install Ansible Azure + Environment'

      - bash: |
          ansible-playbook ./azure/storage/storage.yml --extra-vars "storage_name=$(storageName) storage_resource_group=$(storageGroup) storage_location=$(storageLocation)"
        displayName: 'Run Playbook Script'

   - job: deploy_build
     dependsOn: deploy_ansible
     pool:
       vmImage: 'windows-latest' # Currently Windows 2019 and Visual Studio 2019
     steps:
      - script: echo Deploying Code
# A pipeline with no CI trigger
trigger: none

# No PR triggers
pr: none

stages:
- stage: build_test
  displayName: Build and Test
  jobs:
  - job: build_test
    pool:
      vmImage: 'windows-latest' # Currently Windows 2019 and Visual Studio 2019
    steps:
    - script: echo Code Built and Tested!

- stage: release
  displayName: Release
  dependsOn: build_test
  jobs:
   - job: deploy_ansible
     pool:
       vmImage: 'ubuntu-latest' # Currently Ubuntu 18.04
     steps:
      - task: AzureCLI@2
        displayName: 'Azure CLI '
        inputs:
          azureSubscription: 'Twisters Portal'
          scriptType: bash
          scriptLocation: inlineScript
          inlineScript: |
            echo "##vso[task.setvariable variable=ARM_SUBSCRIPTION_ID]$(az account show --query="id" -o tsv)"
            echo "##vso[task.setvariable variable=ARM_CLIENT_ID]$servicePrincipalId"
            echo "##vso[task.setvariable variable=ARM_CLIENT_SECRET]$servicePrincipalKey"
            echo "##vso[task.setvariable variable=ARM_TENANT_ID]$tenantId"
          addSpnToEnvironment: true

      - bash: |
          touch ~/.azure/credentials
          echo "[default]" >> ~/.azure/credentials
          echo "subscription_id=$(ARM_SUBSCRIPTION_ID)" >> ~/.azure/credentials
          echo "client_id=$(ARM_CLIENT_ID)" >> ~/.azure/credentials
          echo "secret=$(ARM_CLIENT_SECRET)" >> ~/.azure/credentials
          echo "tenant=$(ARM_TENANT_ID)" >> ~/.azure/credentials

          pip install ansible[azure]
        displayName: 'Install Ansible Azure + Environment'

      - task: Ansible@0
        inputs:
          ansibleInterface: 'agentMachine'
          playbookPathOnAgentMachine: './azure/storage/storage.yml'
          inventoriesAgentMachine: 'noInventory'
          args: '--extra-vars "storage_name=$(storageName) storage_resource_group=$(storageGroup) storage_location=$(storageLocation)"'
          failOnStdErr: false

   - job: deploy_build
     dependsOn: deploy_ansible
     pool:
       vmImage: 'windows-latest' # Currently Windows 2019 and Visual Studio 2019
     steps:
      - script: echo Deploying Code
Let’s run the pipeline and see the output.
And again check the Azure Portal to see if it really was successful.

I hope this article is useful and helps you get started running your own Ansible playbooks using Azure Pipelines.

2 thoughts on “IaC Ansible with Azure Pipelines”
Comments are closed.