Following on from my previous article Co-locate IaC with My Application, this article is about consistently deploying IaC (Infrastructure as Code) from a pipeline. For this example I am going to use Azure Pipelines and deploy some simple infrastructure into Azure using ARM (Azure Resource Manager) templates. If you haven’t used Azure DevOps you can sign up for a free account here.
This example will show how to create the release in Azure Pipelines Releases as well as the new YAML stages in Azure Pipelines.
Azure Pipelines – Releases
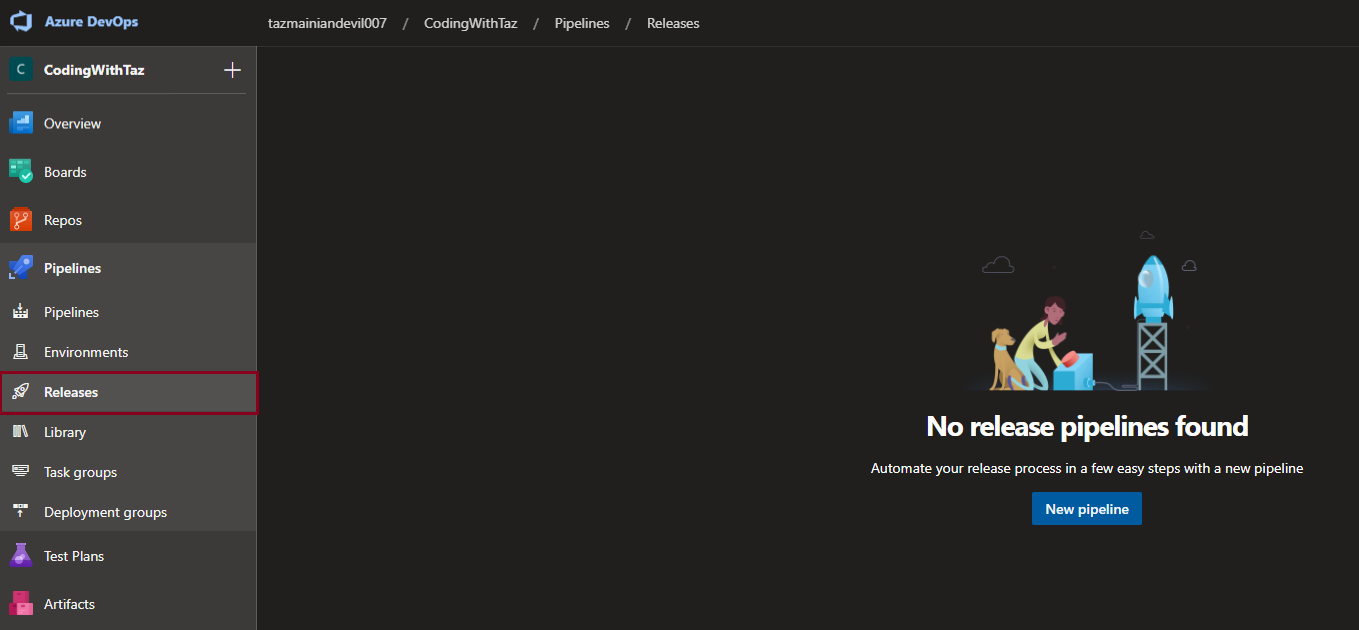
In the Azure DevOps Portal select a project, in this case I am going to use an already setup project ‘CodingWithTaz’ and then from the left hand menu under Pipelines select ‘Releases’.
I have no releases at the moment and so I need to create a ‘New Pipeline’.
A new pipeline starts with two sections, Artifacts and Stages. When creating a new pipeline ‘Select a template’ is automatically selected, as there isn’t a template for deploying templates so I’ll choose ‘Empty job’.
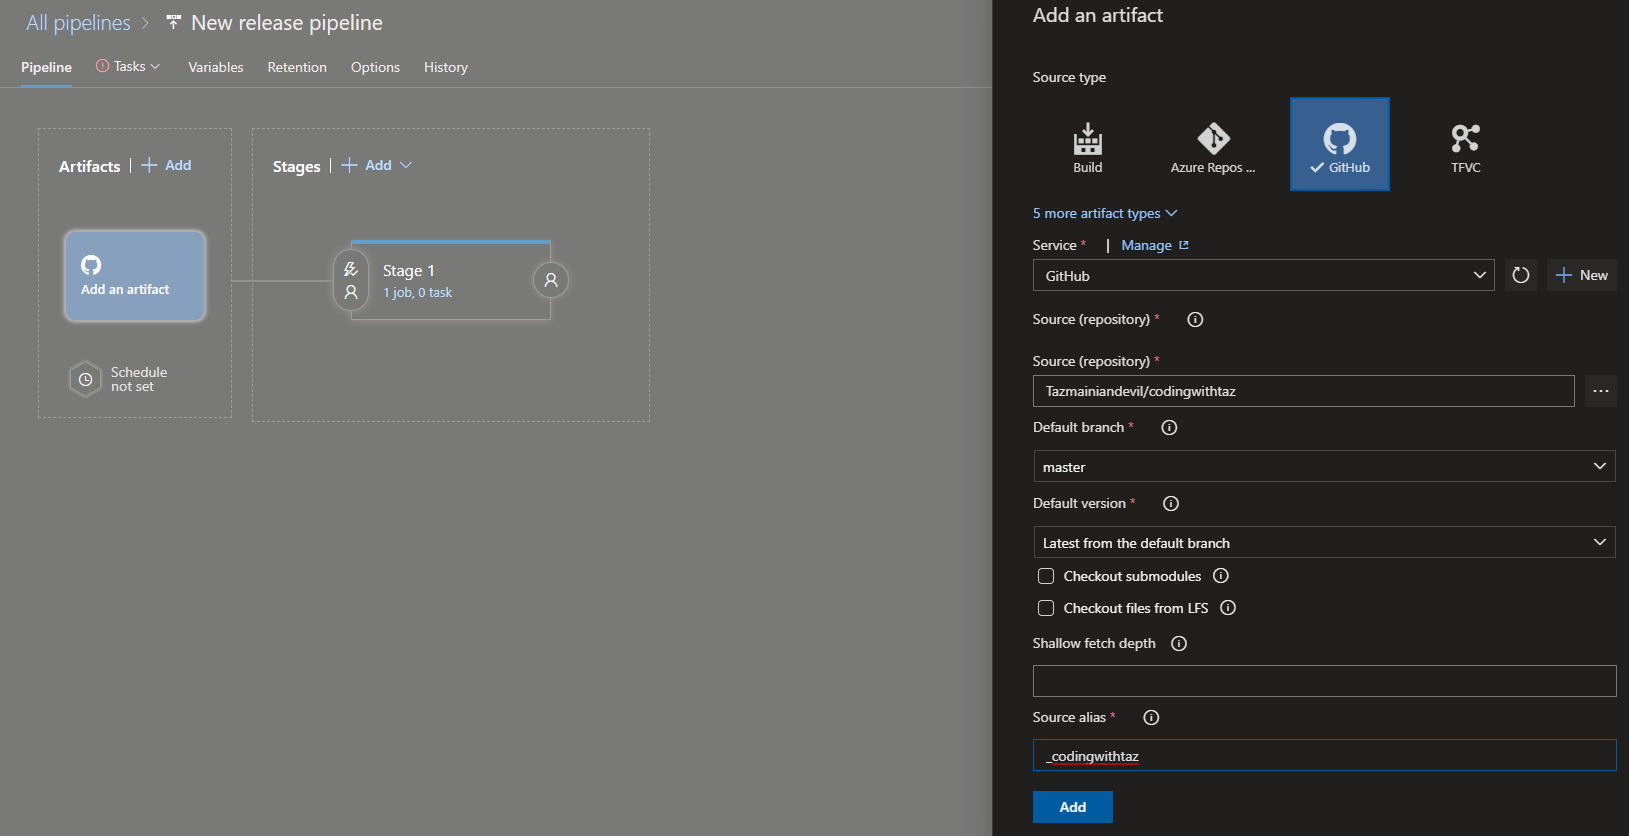
Now I have an empty job I am going to select ‘Add an artifact’.
Artifacts can be from multiple sources e.g. a build pipeline, Azure Repos, GitHub, etc. for this example I am going to connect a GitHub repository where the ARM templates I want to deploy are located.
I already have a GitHub service connection setup and so I will use that and connect to the codingwithtaz repository.
I can now select ‘1 job, 0 task’ link on the ‘Stage 1’ which allows the Agent to be configured.
For this release I am going to leave the defaults which will use a hosted agent ‘Azure Pipelines’.
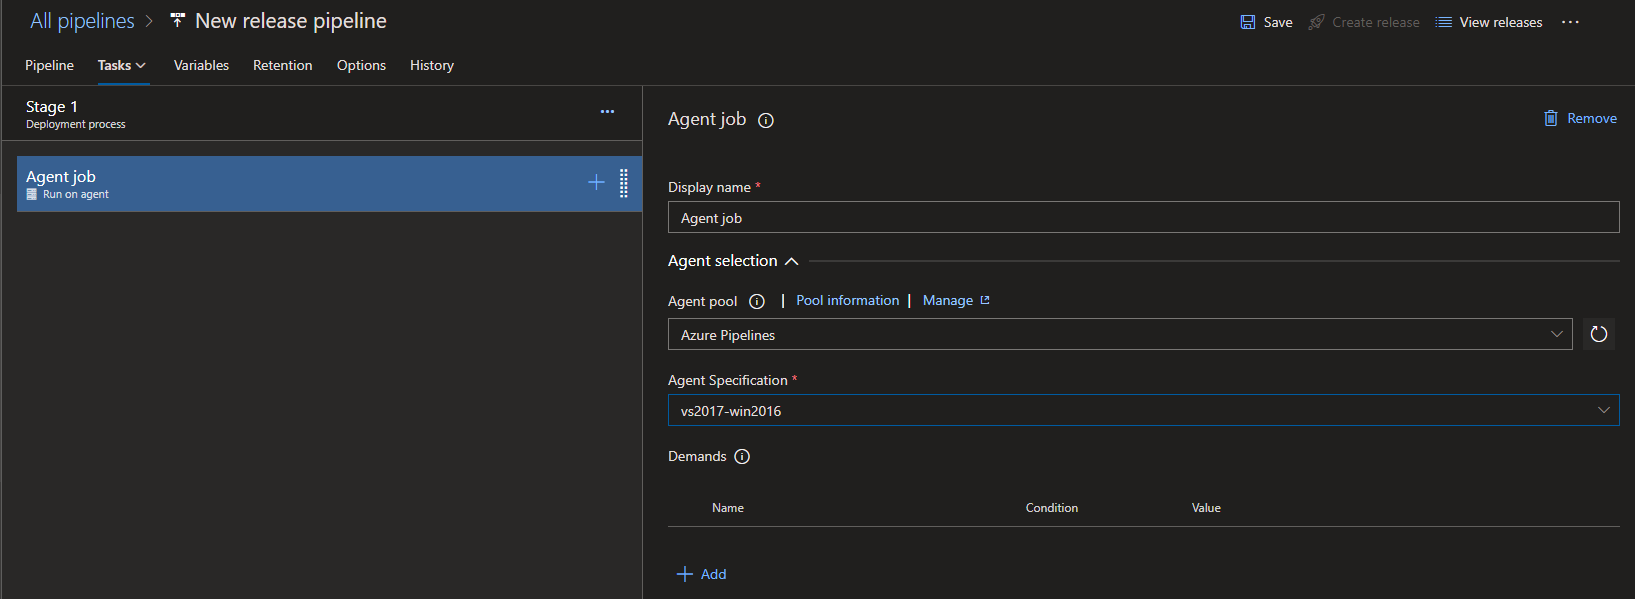
The agent is configured and I need to now add tasks for the agent to run.
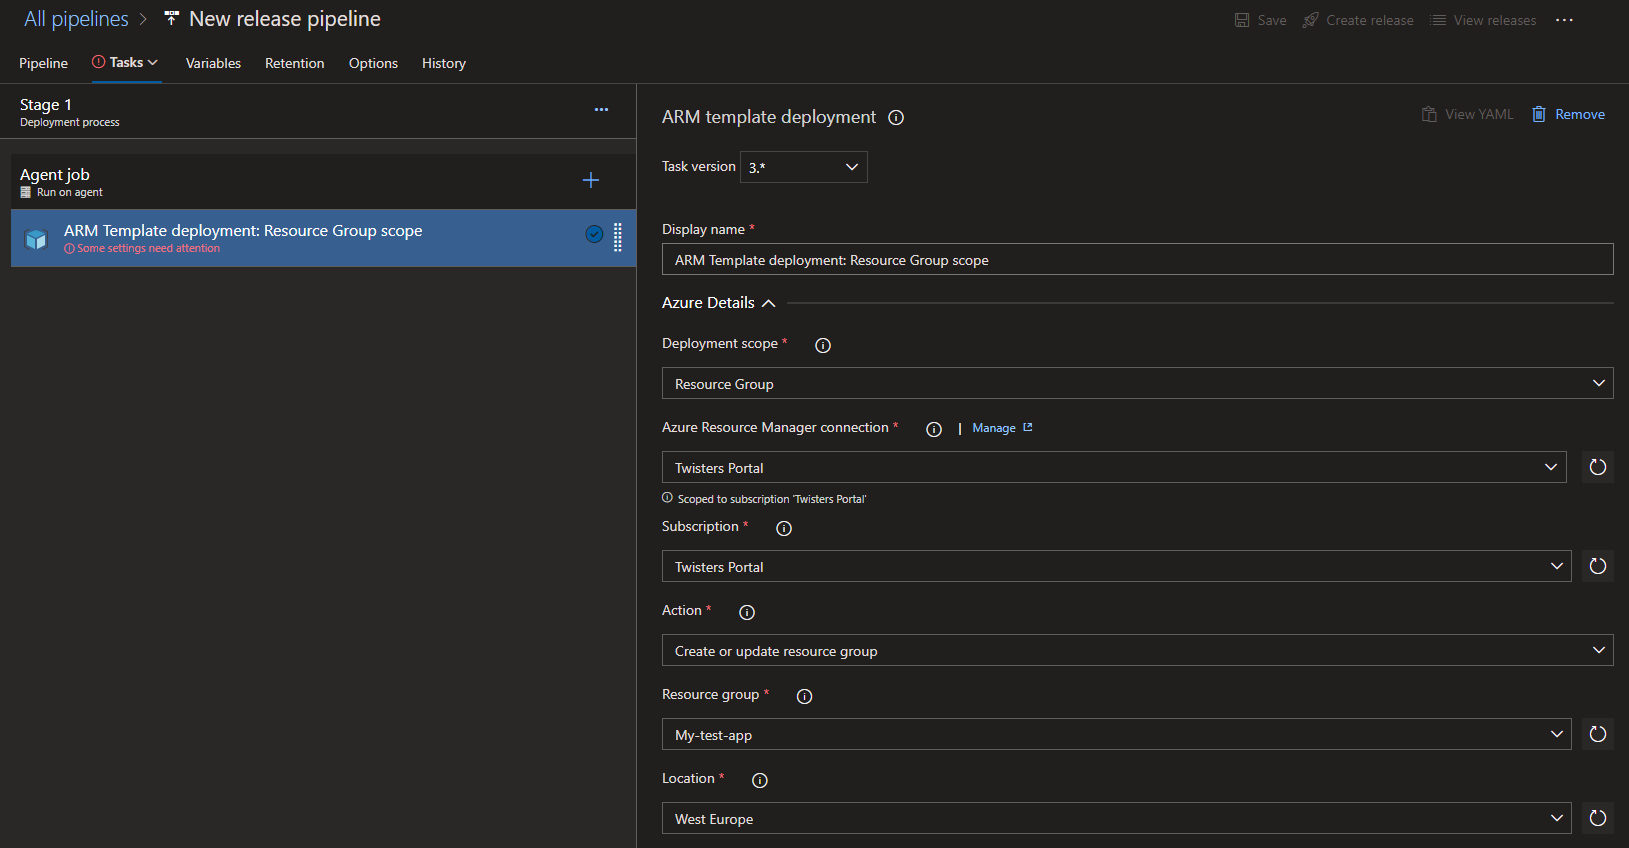
Selecting the ‘+’ on Agent job brings up ‘Add tasks’. There are a lot of tasks so I’ll search for ‘ARM’ to narrow the list and then select ‘Add’ on ‘ARM template deployment’ to add the task.

Now the task is added it shows that some settings need attention. Selecting the task allows it to be configured.
For this example I will use the Resource Group deployment scope and I already have an Azure Resource Manager connection to use named ‘Twisters Portal’. If you need to configure a connection then follow the instructions on the Microsoft Docs.
The action defaults to ‘Create or update resource group’ and so I will leave that. If the required resource group already exists you can select it from the drop down, otherwise enter the name of the resource group to be created. For this I am going to create a new resource group ‘My-test-app’ and use West Europe as the location for the resource group.
Having configured my connection and resource group, I now need to scroll down and configure the template I am going to use in this release.
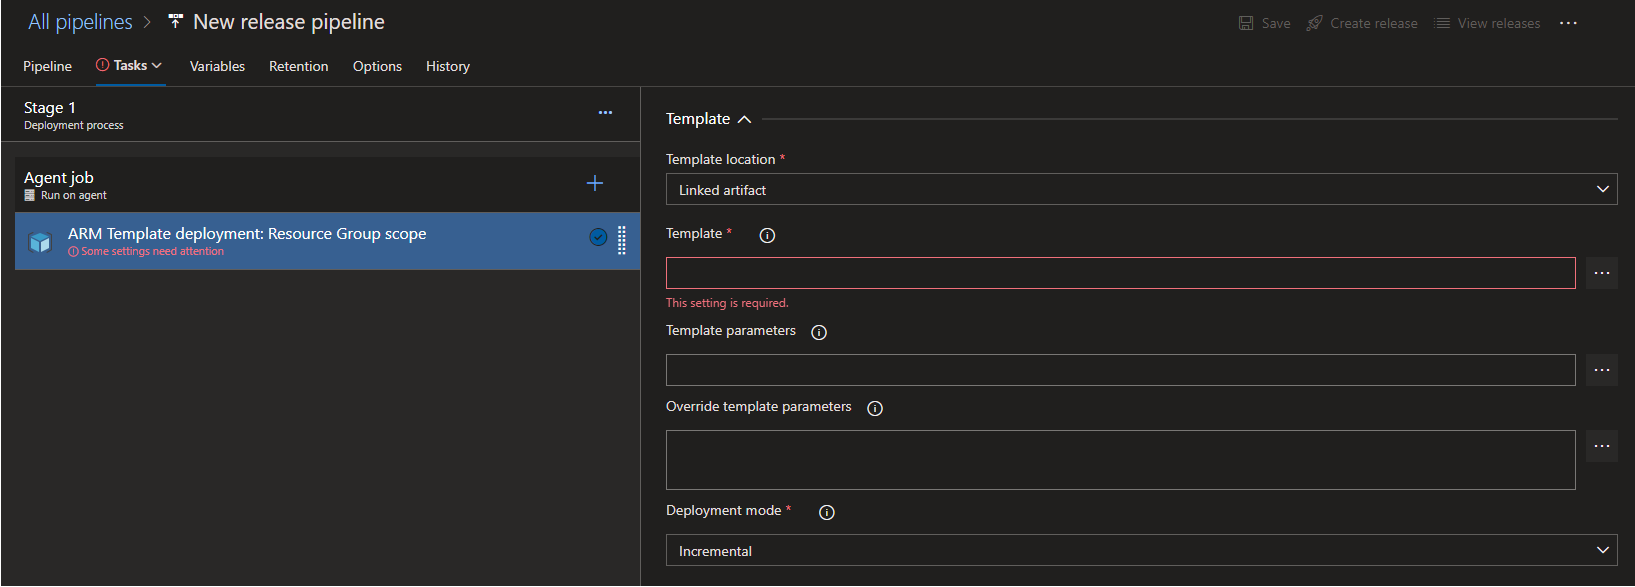
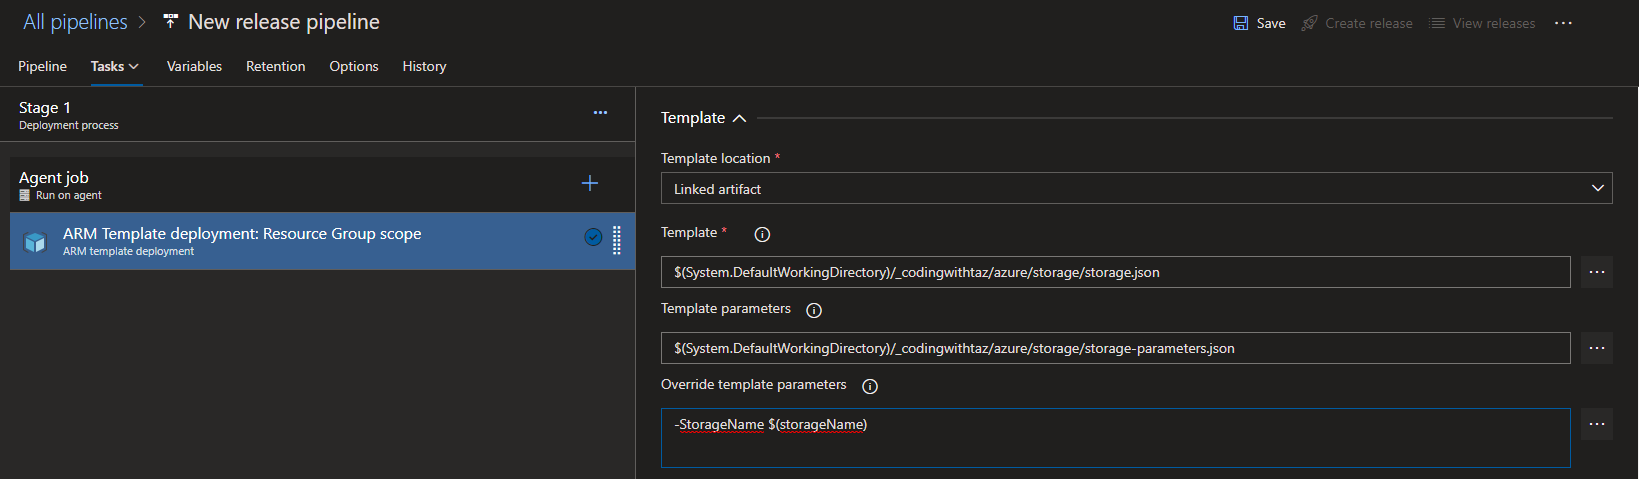
Selecting the three dots on the right of ‘Template’ brings up the linked artifacts dialog. As I have configured a GitHub repository I can now navigate that to find the template I require, for this example I will use a simple template that creates a storage account.

I will now follow the same steps for the template parameters.

If you wish to see the templates used here they are available on GitHub and in the same path structure as shown in the above dialog.
This template allows me to override the storage account name, so I will override the StorageName with a variable called ‘storageName’ in the ‘Override template parameters’ box.
After adding the override parameter, I need to define the ‘storageName’ variable that I used. Selecting the variables tab will allow me to add the new ‘storageName’ variable and provide a value.
Note: Storage Account names have to be all lowercase, no spaces, no special characters and between 3 and 24 characters.

All the steps to deploy the ARM template are now configured and I can run the pipeline.

Let’s head over to the Azure Portal and see if the storage account was created.
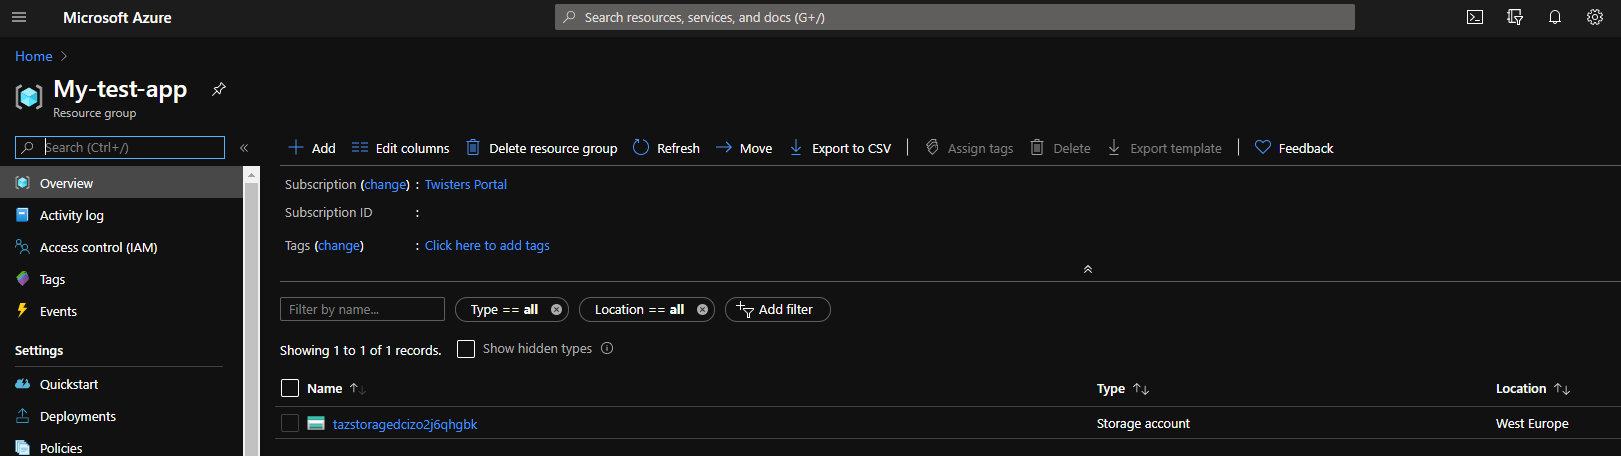
Well the account was created successfully. You may notice that the storage name isn’t exactly the value configured, this is because in the ARM template the name is combined with a unique string and uses all 24 characters. This is useful when requiring a unique name.
Azure Pipelines YAML
If you prefer to use the new YAML pipeline to create your release as code then you can configure through Azure Pipelines and save the YAML file to your repository.
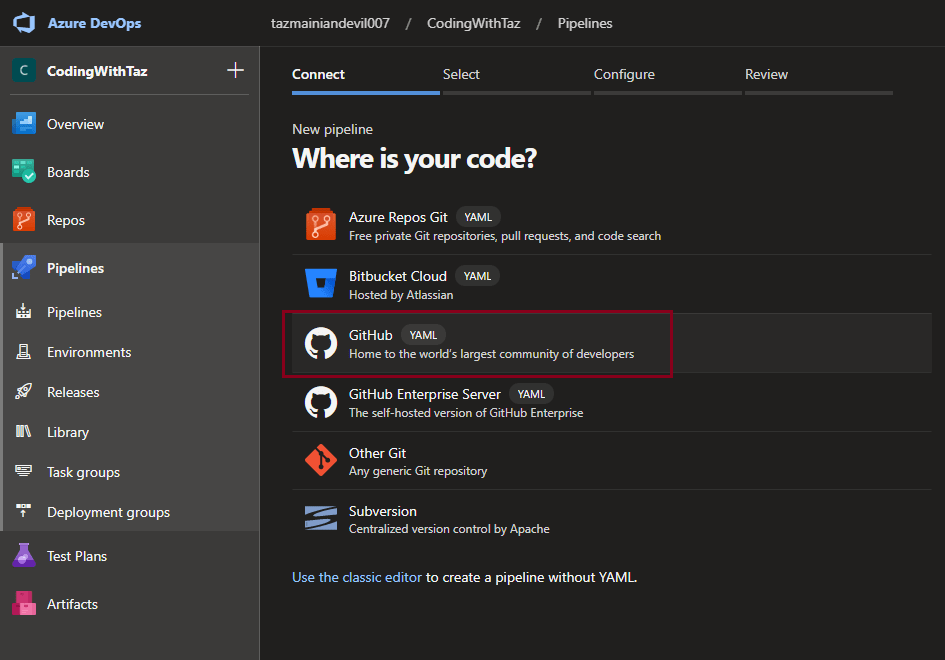
First of all I am going to select ‘Create Pipeline’
For the purpose of this example I am going to use the same repository as I did for the Releases. Selecting the GitHub connection which will guide through logging in to GitHub and then configuring Azure Pipelines to use the connection.
Once configured you will get to the review page which contains a basic YAML configuration ready to be saved into the repository.
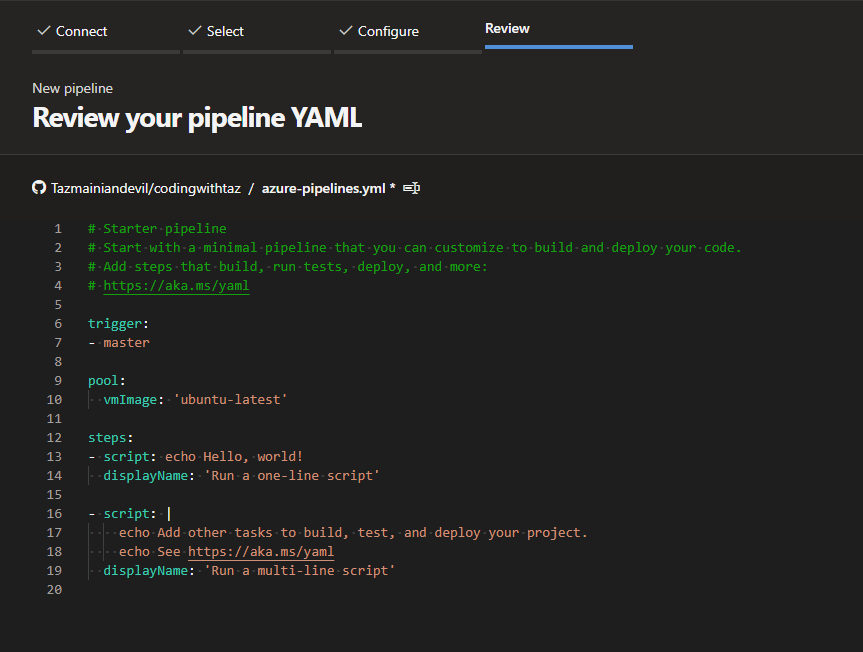
Obviously this is not the build we want to create, so we need to change it achieve the same as the Releases Pipeline.
As with the Releases Pipeline there are some variables that need to be created to match the YAML code.
Note: the PortalSubscription is a secret variable.

To demonstrate using multi-stage pipelines I have added a Build and Test stage and then a Release stage. Each stage has different configuration and different type of agent (defined by vmImage).

Saving this will commit the YAML file to the repository in GitHub called azure-pipelines.yml.
Note: First time run will ask for confirmation of connection to the Azure Portal, each subsequent run will use the confirmed connection.
Once the code runs, the stages can be visualized in the view.

It would be nice to be able to visualize the stages without running the pipeline especially if running a parallel release or fan-out-fan-in pattern.
For further reading on YAML multi-stage pipelines have a look at the Microsoft devblog and the examples on GitHub.
For general information on Azure Pipelines the Microsoft docs are very useful.

3 thoughts on “IaC ARM Templates with Azure Pipelines”
Comments are closed.