Talking with a friend of mine a few weeks ago, we discussed monorepos and how to support them in Azure Pipelines using either GitHub or Azure repos. My friend had multiple mirco services in a monorepo in GitHub and wanted to avoid checking out the whole repo each time to build only a part of it.
After lots of research and reading I came across a git command sparse-checkout, this command has been in git since 2.25 and is marked as experimental.
At the time of writing Azure Pipelines ubuntu-latest and windows-latest showed git 2.33.1 as the git version in use on the Microsoft Build agents.
I went back to my friend to tell him what I had found and he had come to the same conclusion and we decided to share this in case anyone else was wondering the same.
So how do we use this command in an Azure Pipeline. First thing to do is stop Azure Pipelines checking out the code automatically using the checkout step with a value of none.
- checkout: none
Then we need to manually setup connecting to the git repo, we can do this in a script step performing the same steps that happen under the checkout step and include the sparse-checkout configuration at the same time.
The sparse-checkout add uses a space separated list of folder names for the ones you wish to checkout. Azure Pipelines has some predefined build variables which are really handy for getting the URI, etc.
Now that’s setup we can perform a fetch and a checkout to grab the source code and only get the files we need based on the sparse-checkout configuration.
The configuration core.sparseCheckoutCone allows a more restrictive pattern set to be added, for more information see the git documentation.
This all worked fine using a GitHub repository that is connected via the GitHub Azure Pipelines App.
Note: GitHub Apps are the officially recommended way to connect to GitHub (see the docs)
It is a real shame that this just doesn’t work as is for Azure Pipelines but fortunately only a minor change is needed in order for it to work :). You just need to add a git config line or change the git fetch command to include a token and that token can be accessed by a special predefined variable System.AccessToken (see the Microsoft docs for more information).
This was ran using both Microsoft ubuntu and windows agents and it was successful in checking out only the folders specified in the folder list as well as any root files using GitHub and Azure repos.
It has been a lot of fun finding out about the sparse-checkout feature of git and building a pipeline to take advantage of it with GitHub and Azure Repos. Hopefully others will find it useful too and the future of this feature in git is one to watch.
I hope sharing this helps with building monorepos and highlighting the sparse-checkout git feature.
I’ve been using a container for running Terraform for a while but just for local development. More recently though the need to share modules has become more prevalent.
One solution for this is to use a container to not only share modules for development but for deployment as well. This also allows the containers to be versioned, limiting breaking changes affecting multiple pipelines at once.
In this post I am going to cover:
Building a container with shared terraform modules
Pushing the built container to Azure Container Registry
Configuring the dev environment to use the built container
Deploy infrastructure using the built container
NOTE: All of the code used here can be found on my GitHub including the shared modules.
Prerequisites
For this post I will running on Windows and using the following programs:
The container needs to not only have what is needed for development but what is needed to run as a container job in Azure Pipelines e.g. Node. The Microsoft Docs provide more detail about this.
The container is an Alpine Linux base with Node, PowerShell Core, Azure CLI and Terraform installed.
Dockerfile
ARG IMAGE_REPO=alpine
ARG IMAGE_VERSION=3
ARG TERRAFORM_VERSION
ARG POWERSHELL_VERSION
ARG NODE_VERSION=lts-alpine3.14

FROM node:${NODE_VERSION} AS node_base
RUN echo "NODE Version:" && node --version
RUN echo "NPM Version:" && npm --version

FROM ${IMAGE_REPO}:${IMAGE_VERSION} AS installer-env
ARG TERRAFORM_VERSION
ARG POWERSHELL_VERSION
ARG POWERSHELL_PACKAGE=powershell-${POWERSHELL_VERSION}-linux-alpine-x64.tar.gz
ARG POWERSHELL_DOWNLOAD_PACKAGE=powershell.tar.gz
ARG POWERSHELL_URL=https://github.com/PowerShell/PowerShell/releases/download/v${POWERSHELL_VERSION}/${POWERSHELL_PACKAGE}
RUN apk upgrade --update && \
    apk add --no-cache bash wget curl

# Terraform
RUN wget --quiet https://releases.hashicorp.com/terraform/${TERRAFORM_VERSION}/terraform_${TERRAFORM_VERSION}_linux_amd64.zip && \
    unzip terraform_${TERRAFORM_VERSION}_linux_amd64.zip && \
    mv terraform /usr/bin

# PowerShell Core
RUN curl -s -L ${POWERSHELL_URL} -o /tmp/${POWERSHELL_DOWNLOAD_PACKAGE}&& \
    mkdir -p /opt/microsoft/powershell/7 && \
    tar zxf /tmp/${POWERSHELL_DOWNLOAD_PACKAGE} -C /opt/microsoft/powershell/7 && \
    chmod +x /opt/microsoft/powershell/7/pwsh

FROM ${IMAGE_REPO}:${IMAGE_VERSION}
ENV NODE_HOME /usr/local/bin/node
# Copy only the files we need from the previous stages
COPY --from=installer-env ["/usr/bin/terraform", "/usr/bin/terraform"]
COPY --from=installer-env ["/opt/microsoft/powershell/7", "/opt/microsoft/powershell/7"]
RUN ln -s /opt/microsoft/powershell/7/pwsh /usr/bin/pwsh
COPY --from=node_base ["${NODE_HOME}", "${NODE_HOME}"]

# Copy over Modules
RUN mkdir modules
COPY modules modules

LABEL maintainer="Coding With Taz"
LABEL "com.azure.dev.pipelines.agent.handler.node.path"="${NODE_HOME}"

ENV APK_DEV "gcc libffi-dev musl-dev openssl-dev python3-dev make"
ENV APK_ADD "bash sudo shadow curl py3-pip graphviz git"
ENV APK_POWERSHELL="ca-certificates less ncurses-terminfo-base krb5-libs libgcc libintl libssl1.1 libstdc++ tzdata userspace-rcu zlib icu-libs"
# Install additional packages
RUN apk upgrade --update && \
    apk add --no-cache --virtual .pipeline-deps readline linux-pam && \
    apk add --no-cache --virtual .build ${APK_DEV} && \
    apk add --no-cache ${APK_ADD} ${APK_POWERSHELL} && \
    # Install Azure CLI
    pip --no-cache-dir install --upgrade pip && \
    pip --no-cache-dir install wheel && \
    pip --no-cache-dir install azure-cli && \
    apk del .build && \
    apk del .pipeline-deps

RUN echo "PS1='\n\[\033[01;35m\][\[\033[0m\]Terraform\[\033[01;35m\]]\[\033[0m\]\n\[\033[01;35m\][\[\033[0m\]\[\033[01;32m\]\w\[\033[0m\]\[\033[01;35m\]]\[\033[0m\]\n \[\033[01;33m\]->\[\033[0m\] '" >> ~/.bashrc
CMD tail -f /dev/null
The container can be built locally using the docker build command and providing the PowerShell and Terraform versions e.g.
Next thing to do is to build the container and push it to the Azure Container Registry (if you need to know how to set that up in Azure DevOps see my previous post on Configuring ACR). In this pipeline I have also added a Snyk scan to check for vulnerabilities in my container (happy to report there wasn’t any at the time of writing). If you are not familiar with Snyk I recommend you check out their website.
For the build number I have used the version of Terraform and then the date and revision but you can use whatever makes sense for example you could use Semver.
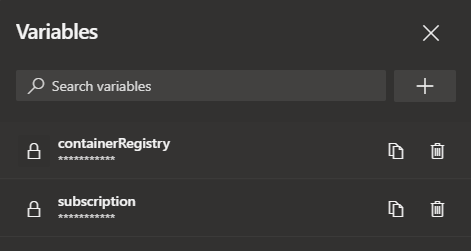
I also setup some pipeline variables for the container registry connection and the container registry name e.g. <your registry>.azurecr.io
Once the container is built it can be viewed in the Azure Portal inside your Azure Container Registry.
Configuring the Dev Environment
Now the container has been created and pushed to the Azure Container Registry the next job is to configure Visual Studio Code.
To start with we need to make sure the extension Remote Containers is installed in Visual Studio Code
In the project where you want to use the container, create a folder called .devcontainer and then a file inside the folder called devcontainer.json and add the following (updating the container registry and container details e.g. name, version, etc.)
// For format details, see https://aka.ms/devcontainer.json. For config options, see the README at:
// https://github.com/microsoft/vscode-dev-containers/tree/v0.205.1/containers/docker-existing-dockerfile
{
	"name": "Terraform Dev",

	// Sets the run context to one level up instead of the .devcontainer folder.
	"context": "..",

	// Update the 'dockerFile' property if you aren't using the standard 'Dockerfile' filename.
	"image": "<your container registry>.azurecr.io/iac/terraform:1.0.10_20211108.1",

	// Set *default* container specific settings.json values on container create.
	"settings": {},

	// Add the IDs of extensions you want installed when the container is created.
	"extensions": [
		"ms-vscode.azure-account",
		"ms-azuretools.vscode-azureterraform",
		"hashicorp.terraform",
		"ms-azure-devops.azure-pipelines"
	]
}
NOTE: You may notice that there is a number of extensions in the above config. I use these extensions in Visual Studio Code for Terraform, Azure Pipelines, etc. and therefore they would also need installing in order to make use of them in the container environment.
TIP: If you right-click on an extension in Visual Studio Code and select ‘Copy Extension ID’ you can easily get the extension information you need to add other extensions to the list.
Now, make sure to login to the Azure Container Registry (either in another window or the terminal in Visual Studio Code) with the Azure CLI for authentication e.g.
az acr login -n <your container registry name>
This needs to be done to be able to pull down the container. Once the login is successful, select the icon in the bottom left of Visual Studio Code to ‘Open a Remote Window’
Then select ‘Reopen in Container’ this will download the container from the Azure Container Registry and load up the project in the container (this can take a minute or so first time).
Once the project is loaded you can create Terraform files as normal and take advantage of the shared modules inside the container.
So lets create a small example. I work a lot in Azure so I am using a shared module to create an Azure Function and another module to format the naming convention for the resources.
From the terminal window I can now authenticate to Azure by logging in via the CLI
az login
Then I can run the terraform commands
terraform init
terraform plan
This produces the terraform plan for the resources that would be created.
Deploy Infrastructure Using the Container
So now I have created a new terraform configuration its time to deploy the changes using the same container.
To do this I am using Azure Pipelines YAML. There are several parts to the pipeline, firstly, in order to store the state for the pipeline there needs to be an Azure Storage Account to store the state file. I like to add this to the pipeline using Azure CLI so that the account is created if it doesn’t exist but also updates it if there are changes.
As with the container build pipeline I used some pipeline variables here for the subscription connection and the container registry e.g. <your registry>.azurecr.io
After the pipeline ran, a quick check in the Azure Portal shows the resources were created as expected
Final Thoughts
I really like using containers for local development and with the remote containers extension for Visual Studio Code its great to be able to run from within a container and share code in this way. I am sure that other things could be shared using this method too.
Being able to version the containers and isolate breaking changes across multiple pipelines is also a bonus. I expect this process could be better, maybe even include pinning of provider versions in Terraform, etc. but its a good start.