Azure, Bicep, Platform Engineering

Building a Self-Service Portal with Port, Azure and Bicep

Introduction

Platform Engineering has become the talk of the town and with it the rise of tooling aimed to help create an IDP (Internal Development Platform), it makes sense to take a look a what’s on offer. One such tool is Port. Port has a lot of features including Software Catalog, Automation, RBAC, Self-Service Actions, Scorecards, etc. as well as integrations into tools such as Datadog, Jira, Pager Duty, GitHub, ArgoCD, etc. Port can also import your existing cloud resources from AWS, Azure and GCP.

Our current cloud provider is Azure and the IaC is in Bicep deployed via Azure Pipelines, Port however does not support Bicep (or ARM) as a provider for importing resources from Azure. The question then is could Port be used to create a self-service portal using Bicep and Azure Pipelines?

The answer is yes, in this article we are going to look at creating a small self-service portal using the above mentioned technologies.

Blank Slate

When you first login to Port you are presented with a blank slate and the feeling of not sure what to do next but fortunately there is a Live Demo site which shows how some of the things go together and there is a lot of documentation as well as an active community to help out too.

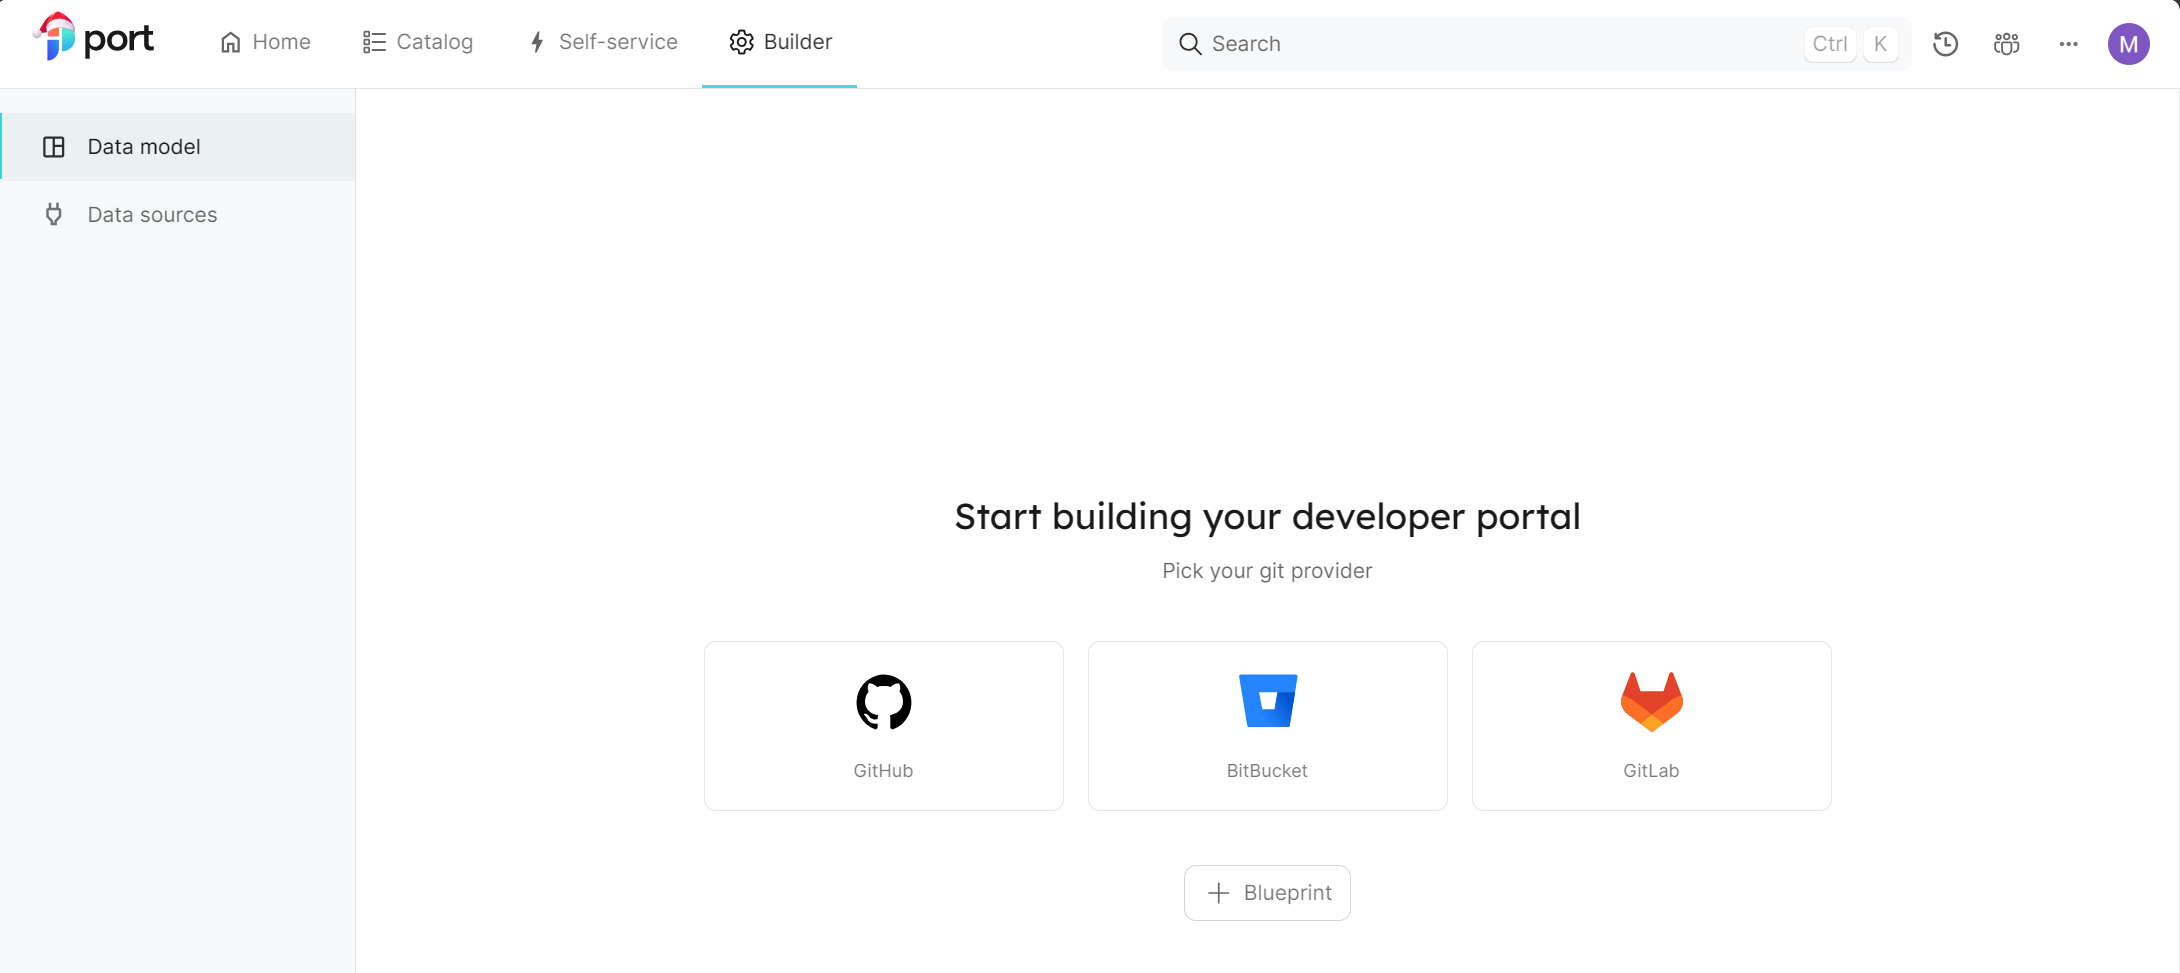
Port has capability of being configured from code and supports a number of providers, however, for this article we are going to just add blueprints via the UI.

First Blueprint

Let’s first create a Cloud Host blueprint we can use to store information such as locations for use with the cloud provider (in this case Azure).

To add a new blueprint, select the button on the right hand side of the Builder screen.

Then fill in name as Cloud Host and pick an icon.

Once this has been created we can add some properties to associate with the provider.

Let’s start with some locations to use with creating some resources.

At this point there is just a blueprint for the cloud host and in order to be useful we will need to add some details for the Cloud Hosts in the Catalog, as Bicep is not a supported ingestion we’ll have to add this manually.

After adding the Cloud Host details manually the catalog looks like this:

Note: In this demo we are just using the location but other information could be added for each configuration.

Resource Blueprint

Let’s head back to the Builder screen and add a new blueprint for creating an Azure Resource. As previously, add a new blueprint for creating resources.

Once created we can add a relation link to the Cloud Host blueprint.

We can also add properties to the Create Resource Blueprint like with Cloud Host that we might want to see in the catalog e.g. IaC used, Environment, App name, etc.

Actions with Azure DevOps

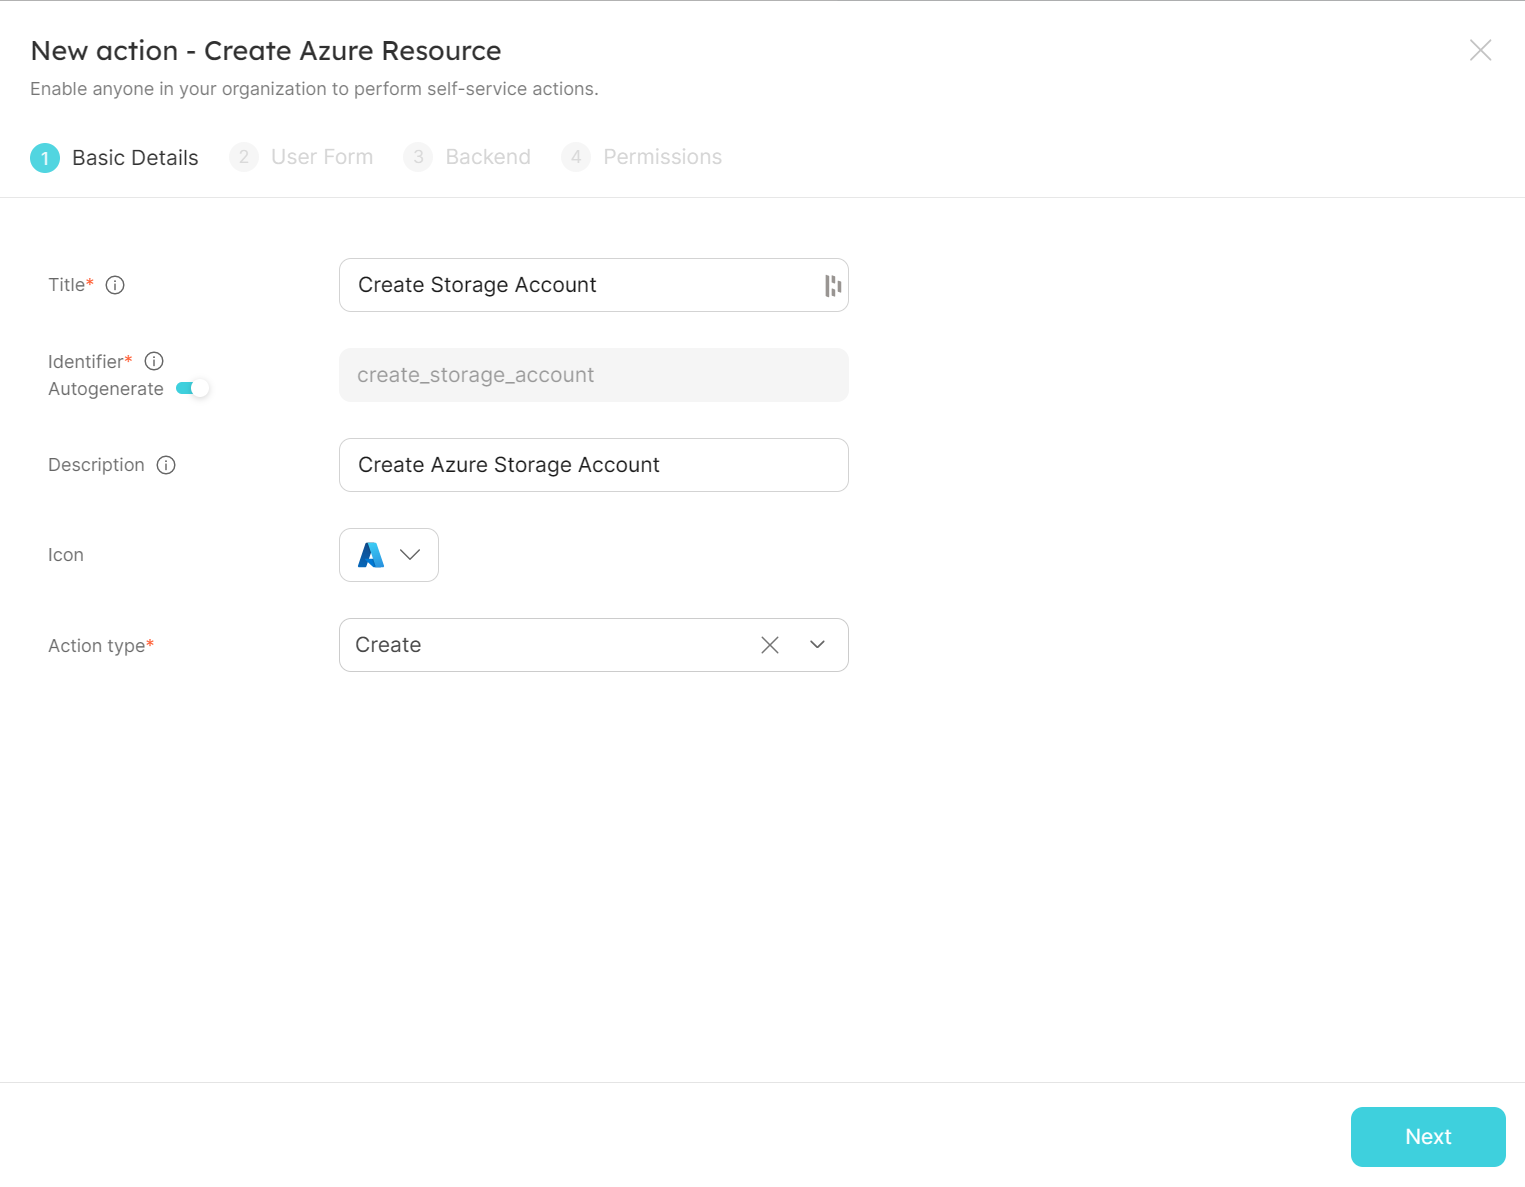
So next up is to add some actions to the blueprint so that actually create some resources.

For our new Action, let’s create a small Azure resource like an Azure Storage Account.

On the next screen we get to define what parameters we want the user to provide when the action is ran, for this example we will add an AppName, Location, Environment, Sku and Access Tier.

Note: Location is going to be linked to the Cloud Host blueprint using the Entity Selection property type.

Note: The identifiers for the form fields must match the expected entries in Bicep e.g. Access Tier would default to access_tier but the Bicep parameter might be accessTier.

The next part is to configure the backend, for this we are going to hook up Azure Pipelines, this page provides a client secret to use to add to Azure DevOps.

In an Azure DevOps project setup a service connection for Port to connect to using “Incoming Webhook”.

Fill in the details from the Port configuration including the client secret and Http Header.

Once saved, fill in the details back in Port and go the final page which is permissions.

For the purposes of this demo we will leave this as is with the default settings.

Pipeline

Now everything is configured in Port, we need to add a pipeline to Azure DevOps to trigger on a selection from Port. The Backend page in the action setup gives an example of a starting pipeline but additional steps are needed to support creating resources using Bicep and we also didn’t think there needed to be a multiple job configuration for this purpose.

The below pipeline is triggered by the configured webhook, it deploys Azure resources using a Bicep template and communicates with Port.io. Key steps include fetching an access token, creating a Bicep parameters file, deploying resources, and updating Port.io with deployment status and information. The pipeline includes logging steps, outputs display, and interaction with the Port.io API for entity upserts and status updates.

The goal of this pipeline is to be one that can be reused for building different kinds of resources instead of having multiple pipelines for each resource. After multiple runs and attempts, we finally arrived at this configuration.

trigger: none
pr: none

resources:
  webhooks:
    - webhook: incomingport
      connection: Port.io

variables:
  subscription: 'MySubscription'
  System.debug: true
  runId: ${{ parameters.incomingport.context.runId }}
  deployParametersFileName: 'deploy.bicepparam'
  deployFileName: deploy_${{ lower(replace(parameters.incomingport.action,'create_', '')) }}.bicep
  deployStatus: "FAILURE"
  deployStatusMessage: "Azure Resource Creation Failed"
  deployMessage: "Deployment Pipeline Failed"

stages:
  - stage: run_resource_creation
    displayName: 'Run Resource Creation'
    jobs:
    - job: fetch_port_access_token
      displayName: 'Create Resources'
      pool:
            vmImage: 'ubuntu-latest'
      steps:
        - script: |
            accessToken=$(curl -X POST \
            -H 'Content-Type: application/json' \
            -d '{"clientId": "$(PORT_CLIENT_ID)", "clientSecret": "$(PORT_CLIENT_SECRET)"}' \
            -s 'https://api.getport.io/v1/auth/access_token' | jq -r '.accessToken')
            echo "##vso[task.setvariable variable=accessToken;issecret=true]$accessToken"
            echo "runId=$(runId)"
          displayName: Fetch Access Token and Run ID
          name: getToken
        - template: templates/sendlogs.yml
          parameters:
            Message: "Create parameters file"
            AccessToken: $(accessToken)
            RunId: $(runId)
            conditionLevel: succeeded()
        - pwsh: |
            $obj = $env:payload | ConvertFrom-Json -AsHashtable
            $additionalObj = $env:entityPayload ?? @() | ConvertFrom-Json -AsHashtable
            $excludeList = @()
            $filename = "$env:deployParametersFileName"

            Out-File -FilePath $filename
            "using '$(deployFileName)'" | Out-File -FilePath $filename -Append
            "param runId = '$env:runId'" | Out-File -FilePath $filename -Append
            # Payload Properties
            ($obj.Keys | ForEach-Object { 
              if ($_ -notin $excludeList) { 
                if($($obj[$_]).GetType().Name -eq "String") {
                  "param $_ = '$($obj[$_])'"
                } 
                else {
                  "param $_ = $($obj[$_])"
                }
              }
            }) | Out-File -FilePath $filename -Append
            # Entity Payload Properties
            if($additionalObj.count -ne 0) {
              $entityExcludeList = @("iac","provider","appname")
              ($additionalObj.Keys | ForEach-Object {
                  if ($_ -notin $entityExcludeList) {
                    if($($additionalObj[$_]).GetType().Name -eq "String") {
                      "param $_ = '$($additionalObj[$_])'"
                    } 
                    else {
                      "param $_ = $($additionalObj[$_])"
                    }
                  }
                }) | Out-File -FilePath $filename -Append
                if($env:entityIdentifier -ne $null) {
                  "param parentName = '$env:entityIdentifier'" | Out-File -FilePath $filename -Append
                }
            }
          displayName: 'Create Parameters File'
          env:
            runId: $(runId)
            payload: ${{ convertToJson(parameters.incomingport.payload.properties) }}
            entityPayload: ${{ convertToJson(parameters.incomingport.payload.entity.properties) }}
            entityIdentifier: ${{ parameters.incomingport.payload.entity.identifier }}
            deployParametersFileName: $(deployParametersFileName)
        - bash: |
            cat $(deployParametersFileName)
          displayName: 'Show File'
          condition: and(succeeded(), eq(variables['System.debug'], 'true'))
        - template: templates/sendlogs.yml
          parameters:
            Message: "Deploying Resources"
            AccessToken: $(accessToken)
            RunId: $(runId)
            conditionLevel: succeeded()
        - task: AzureCLI@2
          displayName: "Deploy Resources"
          inputs:
            azureSubscription: $(subscription)
            scriptType: "pscore"
            scriptLocation: "inlineScript"
            inlineScript: |
              $outputStatus = "SUCCESS"
              $outputStatusMessage = "Azure Resource Creation Succeeded"
              $resourceGroupName = "$env:environment-$env:appname-rg"
              $deploymentName = "deploy_$env:runId"
              if($(az group exists --name $resourceGroupName) -eq $false) {
                az group create --name $resourceGroupName --location $env:location
              }
              $output = $(az deployment group create --resource-group $resourceGroupName --template-file $env:deployFileName --parameters $env:deployParametersFileName --name $deploymentName 2>&1)
              if (!$?) {
                $outputStatus = "FAILURE"
                $outputStatusMessage = "Azure Resource Creation Failed"
                try {
                  $obj = $output.Exception.Message -replace '["()]', '\$&'
                  $output = $obj
                } catch {
                  $output = "Something went wrong"
                }
              } else {
                $output = $output -replace '["()]', '\$&'
              }
              $title = (Get-Culture).TextInfo.ToTitleCase($env:deployTitle)

              $resourceName = $(az deployment group show -g $resourceGroupName -n $deploymentName --query properties.outputs.resourceName.value -o tsv)
              Write-Host "##vso[task.setvariable variable=resourceName;]$resourceName"
              Write-Host "##vso[task.setvariable variable=deployMessage;]$output"
              Write-Host "##vso[task.setvariable variable=deployStatus;]$outputStatus"
              Write-Host "##vso[task.setvariable variable=deployStatusMessage;]$outputStatusMessage"
              Write-Host "##vso[task.setvariable variable=deployTitle;]$title"
          env:
            runId: $(runId)
            location: ${{ parameters.incomingport.payload.properties.location }}
            environment: ${{ coalesce(parameters.incomingport.payload.properties.environment, parameters.incomingport.payload.entity.properties.environment) }}
            appname: ${{ coalesce(parameters.incomingport.payload.properties.appname, parameters.incomingport.payload.entity.properties.appname) }}
            deployFileName: $(deployFileName)
            deployParametersFileName: $(deployParametersFileName)
            deployTitle: ${{ lower(replace(replace(parameters.incomingport.action,'create_', ''),'_',' ')) }}
        - script: |
            echo '$(resourceName)'
          displayName: 'Show Outputs'
        - script: |
            curl -X POST \
              -H 'Content-Type: application/json' \
              -H "Authorization: Bearer $(accessToken)" \
              -d '{
                    "identifier": "$(resourceName)",
                    "title": "$(deployTitle)",
                    "properties": {"environment": "${{ parameters.incomingport.payload.properties.environment }}","iac": "Bicep","appname": "${{ coalesce(parameters.incomingport.payload.properties.appname, parameters.incomingport.payload.properties.name) }}"},
                    "relations": {"cloud_host": "${{ parameters.incomingport.payload.properties.location }}"}
                  }' \
              "https://api.getport.io/v1/blueprints/${{ parameters.incomingport.context.blueprint }}/entities?upsert=true&run_id=$(runId)&create_missing_related_entities=true"
          displayName: 'Upsert entity'
        - template: templates/sendlogs.yml
          parameters:
            Message: $(deployMessage)
            AccessToken: $(accessToken)
            RunId: $(runId)
        - template: templates/sendlogs.yml
          parameters:
            Message: "Deployment Finished"
            AccessToken: $(accessToken)
            RunId: $(runId)
        - template: templates/sendStatus.yml
          parameters:
            Status: $(deployStatus)
            Message: $(deployStatusMessage)
            AccessToken: $(accessToken)
            RunId: $(runId)

sendlogs.yml

parameters:
- name: Message
  type: object  
- name: RunId
  type: string
- name: AccessToken
  type: string
- name: conditionLevel
  type: object
  default: always()
  values:
   - always()
   - succeeded()
   - failed()
steps:
- bash: |
    curl -X POST \
      -H 'Content-Type: application/json' \
      -H "Authorization: Bearer ${{ parameters.AccessToken }}" \
      -d '{"message": "${{ parameters.Message }}"}' \
      "https://api.getport.io/v1/actions/runs/${{ parameters.RunId }}/logs"
  displayName: Send Logs  
  condition: and(${{ parameters.conditionLevel }}, ne('${{ parameters.Message }}', ''))

sendStatus.yml

parameters:
- name: Status
  type: string
  default: 'FAILURE'
- name: Message
  type: string
  default: "Azure Resource Creation Successful"
- name: RunId
  type: string
- name: AccessToken
  type: string
steps:
- bash: |
    curl -X PATCH \
      -H 'Content-Type: application/json' \
      -H "Authorization: Bearer ${{ parameters.AccessToken }}" \
      -d '{"status":"${{ parameters.Status }}", "message": {"run_status": "${{ parameters.Message }}"}}' \
      "https://api.getport.io/v1/actions/runs/${{ parameters.RunId }}"
  displayName: 'Send Status'
  condition: always()

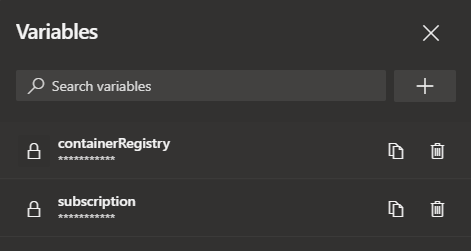
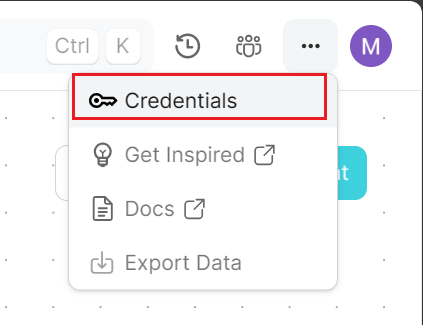
There is also a couple of required variables from Port that are needed by the pipeline, the port client id and port client secret

These values can be found in Port by selecting the … icon and then credentials.

Self-Service

With the pipeline created we can now use the Self-Service Hub in Port to create our new resource.

Add some details and execute.

When execute has begun then there is a status on the right hand side.

In Azure DevOps the webhook triggers the running pipeline.

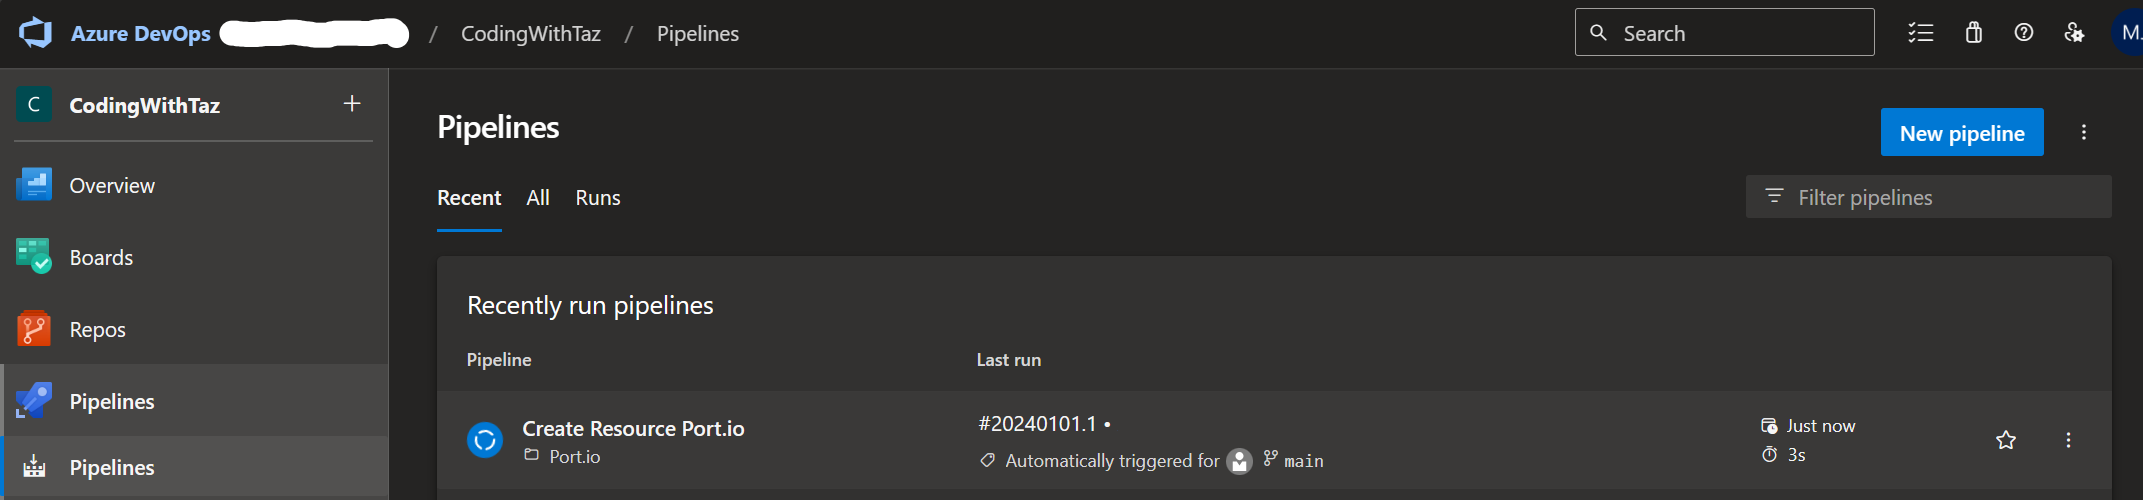
When running the pipeline returns status information to Port and on completion updates the status.

And on the catalog screen there is now an entry for the storage account.

Additional Blueprints

The pipeline has been created to be generic and so should allow other types of resources to be created with accompanying Bicep configurations. The Create Azure Resource blueprint doesn’t seem to be the best place for resources that might need a Day-2 operation so, lets add another blueprint for SQL Server with a Day-2 operation to add a SQL Database into a built SQL Server.

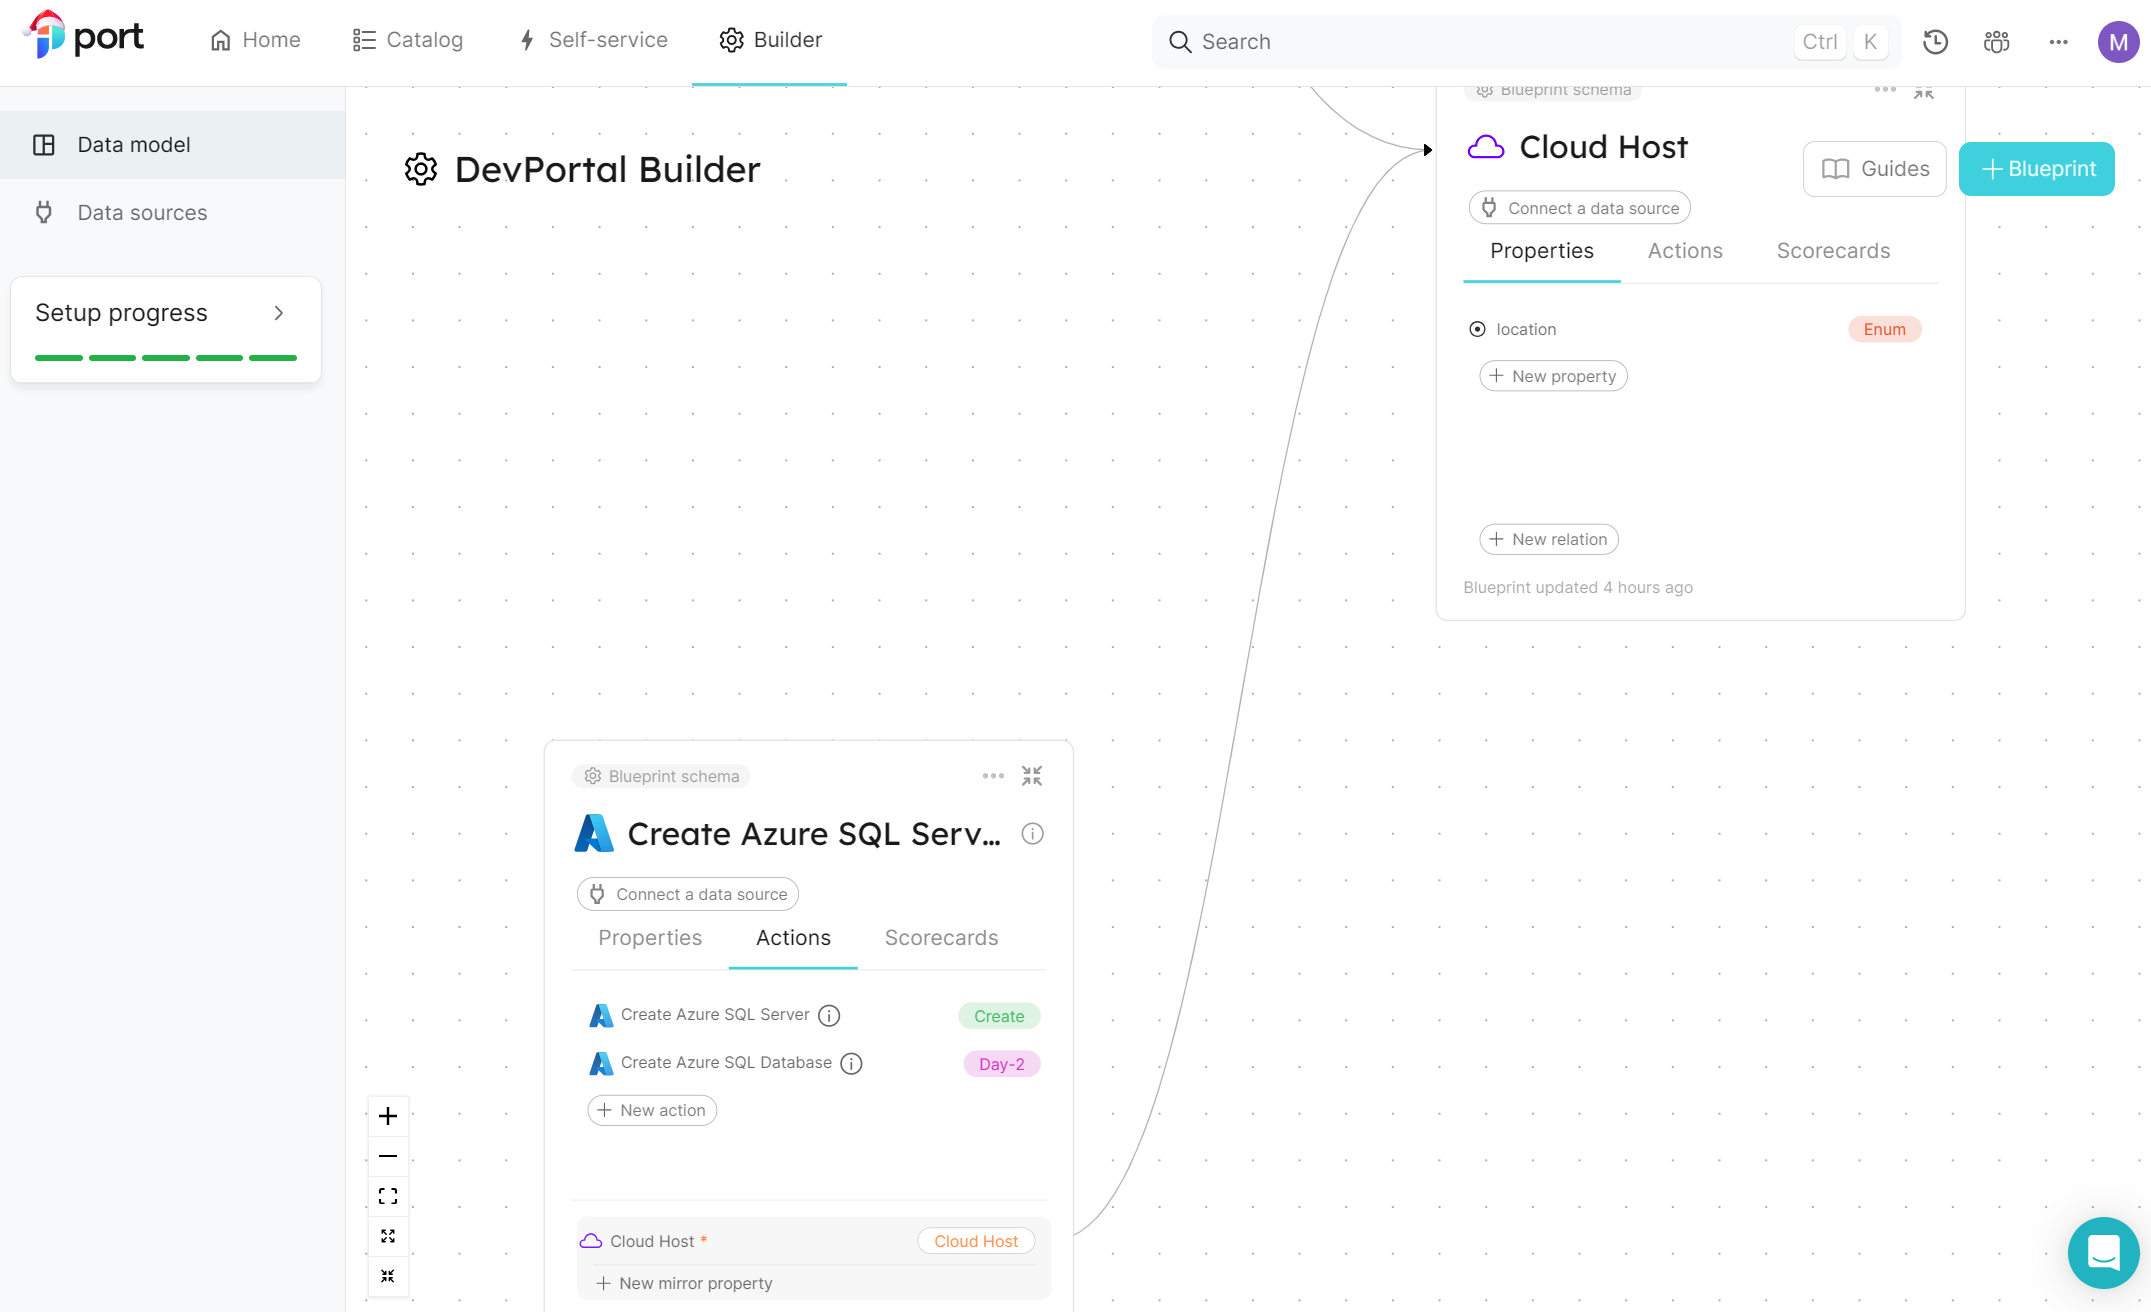
Following the earlier example of creating blueprints and actions, first create a “Create Azure SQL Server” blueprint and then 2 actions “Create Azure SQL Server” using the Create type with user form of Environment, AppName and Location (as previously) and then “Create Azure SQL Database” using the Day-2 type with a single user form entry of Name.

This should then look something like this:

The Self-Service screen now includes the additional actions.

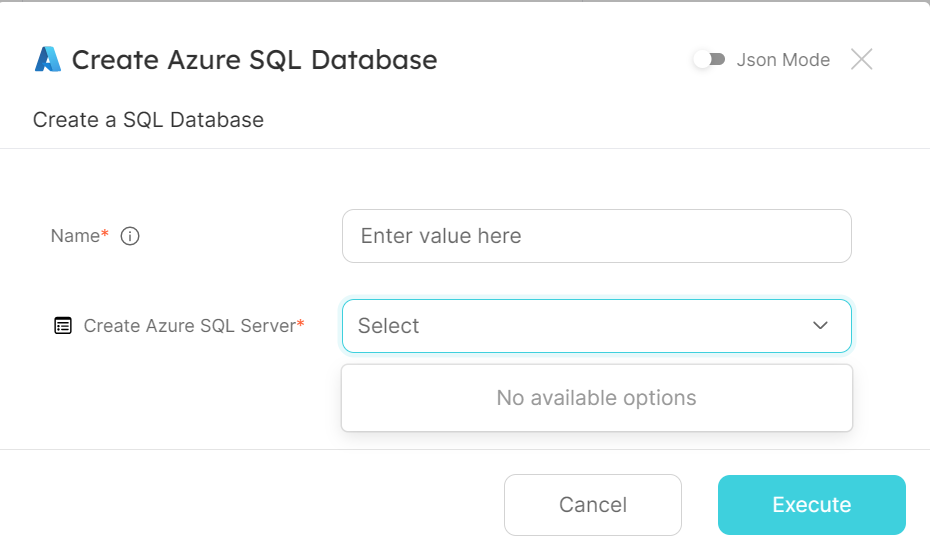
Trying to run the Day-2 operation at this point would not provide an entry for a SQL Server.

But once there is a SQL Server created this will allow it to be selected for the Day-2 operation and deploy a database.

Still not entirely sure how to get a display of the databases deployed in the catalog screen for the Day-2 operation but the run history shows the Create Azure SQL Database action and payload.

All the code shown here for the Bicep and Azure Pipelines can be found here in GitHub.

Final Thoughts

Before writing this article I had no prior experience of Port and there maybe different ways to achieve the above but after the initial “where does everything go” part it seemed a lot easier to see where effort is required to build something functional. You might think why use Bicep when you could import things using the supported integrations, mainly because I use a lot of Bicep and Pulumi and I wanted to see if Port was still an option even without direct support for those technologies and I think that it has merit and as something that is still evolving and improving it’s possible Bicep could be supported one day.

Exploring the Self-Service part of Port was the driving force for this article but there is so much more on offer to dive into and explorer. Port’s free tier supports 15 registered users and so it is a great place to get started and try it out without having to think about costs.

I really like the direction that Platform Engineering is taking and these types of tools are a game changer when it comes to reducing the cognitive load of deployment, infrastructure, etc.. from the Developers and allowing them to concentrate on the features they are delivering instead of how it gets where it needs to.

I hope this article has been interesting and directed you to take a look at Port for your own IDP needs, I am interested to see how Port evolves in the coming months/years.

Azure, Azure Pipelines, DevOps, IaC, Terraform

Using Containers to Share Terraform Modules and Deploy with Azure Pipelines

I’ve been using a container for running Terraform for a while but just for local development. More recently though the need to share modules has become more prevalent.

One solution for this is to use a container to not only share modules for development but for deployment as well. This also allows the containers to be versioned, limiting breaking changes affecting multiple pipelines at once.

In this post I am going to cover:

  • Building a container with shared terraform modules
  • Pushing the built container to Azure Container Registry
  • Configuring the dev environment to use the built container
  • Deploy infrastructure using the built container

NOTE: All of the code used here can be found on my GitHub including the shared modules.

Prerequisites

For this post I will running on Windows and using the following programs:

Building the Container

The container needs to not only have what is needed for development but what is needed to run as a container job in Azure Pipelines e.g. Node. The Microsoft Docs provide more detail about this.

The container is an Alpine Linux base with Node, PowerShell Core, Azure CLI and Terraform installed.

Dockerfile

ARG IMAGE_REPO=alpine
ARG IMAGE_VERSION=3
ARG TERRAFORM_VERSION
ARG POWERSHELL_VERSION
ARG NODE_VERSION=lts-alpine3.14

FROM node:${NODE_VERSION} AS node_base
RUN echo "NODE Version:" && node --version
RUN echo "NPM Version:" && npm --version

FROM ${IMAGE_REPO}:${IMAGE_VERSION} AS installer-env
ARG TERRAFORM_VERSION
ARG POWERSHELL_VERSION
ARG POWERSHELL_PACKAGE=powershell-${POWERSHELL_VERSION}-linux-alpine-x64.tar.gz
ARG POWERSHELL_DOWNLOAD_PACKAGE=powershell.tar.gz
ARG POWERSHELL_URL=https://github.com/PowerShell/PowerShell/releases/download/v${POWERSHELL_VERSION}/${POWERSHELL_PACKAGE}
RUN apk upgrade --update && \
    apk add --no-cache bash wget curl

# Terraform
RUN wget --quiet https://releases.hashicorp.com/terraform/${TERRAFORM_VERSION}/terraform_${TERRAFORM_VERSION}_linux_amd64.zip && \
    unzip terraform_${TERRAFORM_VERSION}_linux_amd64.zip && \
    mv terraform /usr/bin
    
# PowerShell Core
RUN curl -s -L ${POWERSHELL_URL} -o /tmp/${POWERSHELL_DOWNLOAD_PACKAGE}&& \
    mkdir -p /opt/microsoft/powershell/7 && \
    tar zxf /tmp/${POWERSHELL_DOWNLOAD_PACKAGE} -C /opt/microsoft/powershell/7 && \
    chmod +x /opt/microsoft/powershell/7/pwsh 

FROM ${IMAGE_REPO}:${IMAGE_VERSION} 
ENV NODE_HOME /usr/local/bin/node
# Copy only the files we need from the previous stages
COPY --from=installer-env ["/usr/bin/terraform", "/usr/bin/terraform"]
COPY --from=installer-env ["/opt/microsoft/powershell/7", "/opt/microsoft/powershell/7"]
RUN ln -s /opt/microsoft/powershell/7/pwsh /usr/bin/pwsh
COPY --from=node_base ["${NODE_HOME}", "${NODE_HOME}"]

# Copy over Modules
RUN mkdir modules
COPY modules modules

LABEL maintainer="Coding With Taz"
LABEL "com.azure.dev.pipelines.agent.handler.node.path"="${NODE_HOME}"

ENV APK_DEV "gcc libffi-dev musl-dev openssl-dev python3-dev make"
ENV APK_ADD "bash sudo shadow curl py3-pip graphviz git"
ENV APK_POWERSHELL="ca-certificates less ncurses-terminfo-base krb5-libs libgcc libintl libssl1.1 libstdc++ tzdata userspace-rcu zlib icu-libs"
# Install additional packages
RUN apk upgrade --update && \
    apk add --no-cache --virtual .pipeline-deps readline linux-pam && \
    apk add --no-cache --virtual .build ${APK_DEV} && \
    apk add --no-cache ${APK_ADD} ${APK_POWERSHELL} && \
    # Install Azure CLI
    pip --no-cache-dir install --upgrade pip && \
    pip --no-cache-dir install wheel && \
    pip --no-cache-dir install azure-cli && \
    apk del .build && \
    apk del .pipeline-deps 

RUN echo "PS1='\n\[\033[01;35m\][\[\033[0m\]Terraform\[\033[01;35m\]]\[\033[0m\]\n\[\033[01;35m\][\[\033[0m\]\[\033[01;32m\]\w\[\033[0m\]\[\033[01;35m\]]\[\033[0m\]\n \[\033[01;33m\]->\[\033[0m\] '" >> ~/.bashrc 
CMD tail -f /dev/null

The container can be built locally using the docker build command and providing the PowerShell and Terraform versions e.g.

docker build --build-arg TERRAFORM_VERSION="1.0.10" --build-arg POWERSHELL_VERSION="7.1.5" -t my-terraform .

Pushing the container to Azure Container Registry

Next thing to do is to build the container and push it to the Azure Container Registry (if you need to know how to set that up in Azure DevOps see my previous post on Configuring ACR). In this pipeline I have also added a Snyk scan to check for vulnerabilities in my container (happy to report there wasn’t any at the time of writing). If you are not familiar with Snyk I recommend you check out their website.

For the build number I have used the version of Terraform and then the date and revision but you can use whatever makes sense for example you could use Semver.

I also setup some pipeline variables for the container registry connection and the container registry name e.g. <your registry>.azurecr.io

trigger: 
    - main

pr: none

name: $(terraformVersion)_$(Date:yyyyMMdd)$(Rev:.r)

variables:
 dockerFilePath: dockerfile
 imageRepository: iac/terraform
 terraformVersion: 1.0.10
 powershellVersion: 7.1.5

pool:
  vmImage: "ubuntu-latest"

steps:
  - task: Docker@2
    displayName: "Build Terraform Image"
    inputs:
      containerRegistry: '$(containerRegistryConnection)'
      repository: '$(imageRepository)'
      command: 'build'
      Dockerfile: '$(dockerfilePath)'
      arguments: '--build-arg TERRAFORM_VERSION="$(terraformVersion)" --build-arg POWERSHELL_VERSION="$(powershellVersion)"'
      tags: | 
        $(Build.BuildNumber)
  - task: SnykSecurityScan@1
    inputs:
      serviceConnectionEndpoint: 'Snyk'
      testType: 'container'
      dockerImageName: '$(containerRegistry)/$(imageRepository):$(Build.BuildNumber)'
      dockerfilePath: '$(dockerfilePath)'
      monitorWhen: 'always'
      severityThreshold: 'high'
      failOnIssues: true
  - task: Docker@2
    displayName: "Build and Push Terraform Image"
    inputs:
      containerRegistry: '$(containerRegistryConnection)'
      repository: '$(imageRepository)'
      command: 'Push'
      Dockerfile: '$(dockerfilePath)'
      tags: | 
        $(Build.BuildNumber)

Once the container is built it can be viewed in the Azure Portal inside your Azure Container Registry.

Configuring the Dev Environment

Now the container has been created and pushed to the Azure Container Registry the next job is to configure Visual Studio Code.

To start with we need to make sure the extension Remote Containers is installed in Visual Studio Code

In the project where you want to use the container, create a folder called .devcontainer and then a file inside the folder called devcontainer.json and add the following (updating the container registry and container details e.g. name, version, etc.)

// For format details, see https://aka.ms/devcontainer.json. For config options, see the README at:
// https://github.com/microsoft/vscode-dev-containers/tree/v0.205.1/containers/docker-existing-dockerfile
{
	"name": "Terraform Dev",

	// Sets the run context to one level up instead of the .devcontainer folder.
	"context": "..",

	// Update the 'dockerFile' property if you aren't using the standard 'Dockerfile' filename.
	"image": "<your container registry>.azurecr.io/iac/terraform:1.0.10_20211108.1",

	// Set *default* container specific settings.json values on container create.
	"settings": {},
	
	// Add the IDs of extensions you want installed when the container is created.
	"extensions": [
		"ms-vscode.azure-account",
		"ms-azuretools.vscode-azureterraform",
		"hashicorp.terraform",
		"ms-azure-devops.azure-pipelines"
	]
}

NOTE: You may notice that there is a number of extensions in the above config. I use these extensions in Visual Studio Code for Terraform, Azure Pipelines, etc. and therefore they would also need installing in order to make use of them in the container environment.

TIP: If you right-click on an extension in Visual Studio Code and select ‘Copy Extension ID’ you can easily get the extension information you need to add other extensions to the list.

Now, make sure to login to the Azure Container Registry (either in another window or the terminal in Visual Studio Code) with the Azure CLI for authentication e.g.

az acr login -n <your container registry name>

This needs to be done to be able to pull down the container. Once the login is successful, select the icon in the bottom left of Visual Studio Code to ‘Open a Remote Window’

Then select ‘Reopen in Container’ this will download the container from the Azure Container Registry and load up the project in the container (this can take a minute or so first time).

Once the project is loaded you can create Terraform files as normal and take advantage of the shared modules inside the container.

So lets create a small example. I work a lot in Azure so I am using a shared module to create an Azure Function and another module to format the naming convention for the resources.

terraform {
  required_providers {
    azurerm = {
      source  = "hashicorp/azurerm"
      version = "~> 2.83"
    }
  }
  backend "local" {}
  required_version = ">= 1.0.10"
}

provider "azurerm" {
  features {}
}


module "rgname" {
    source        = "/modules/naming"
    name          = "myapp"
    env           = "rg-${var.env}"
    resource_type = ""
    location      = var.location
    separator     = "-"
}

resource "azurerm_resource_group" "rg" {
  name     = module.rgname.result
  location = "uksouth"
}

module "funcApp" {
  source                    = "/modules/linux_azure_function"
  resource_group            = azurerm_resource_group.rg.name
  resource_group_location   = azurerm_resource_group.rg.location
  env                       = var.env
  appName                   = var.appName
  funcWorkerRuntime         = "dotnet-isolated"
  dotnetVersion             = "v5.0"
  additionalFuncAppSettings = {
    mysetting = "somevalue"
  }
  tags                      = var.tags
}

From the terminal window I can now authenticate to Azure by logging in via the CLI

az login

Then I can run the terraform commands

terraform init
terraform plan

This produces the terraform plan for the resources that would be created.

Deploy Infrastructure Using the Container

So now I have created a new terraform configuration its time to deploy the changes using the same container.

To do this I am using Azure Pipelines YAML. There are several parts to the pipeline, firstly, in order to store the state for the pipeline there needs to be an Azure Storage Account to store the state file. I like to add this to the pipeline using Azure CLI so that the account is created if it doesn’t exist but also updates it if there are changes.

 - task: AzureCLI@2
    displayName: 'Create/Update State File Storage'
    inputs:
        azureSubscription: '$(subscription)'
        scriptType: bash
        scriptLocation: inlineScript
        inlineScript: |
          az group create --location $(location) --name $(terraformGroup)
          az storage account create --name $(terraformStorageName) --resource-group $(terraformGroup) --location $(location) --sku $(terraformStorageSku) --min-tls-version TLS1_2 --https-only true --allow-blob-public-access false
          az storage container create --name $(terraformContainerName) --account-name $(terraformStorageName)
        addSpnToEnvironment: false

The terraform backend configuration is set to local for development and so I need a step in the pipeline to update it to use backend “azurerm”.

  - bash: |
      sed -i 's/backend "local" {}/backend "azurerm" {}/g' main.tf
    displayName: 'Update Backend in terraform file'

For the Terraform commands I tend to use the Microsoft Terraform Tasks with additional command options for the plan file

- task: TerraformTaskV2@2
    displayName: 'Terraform Init'
    inputs:
      backendServiceArm: '$(subscription)'
      backendAzureRmResourceGroupName: '$(terraformGroup)'
      backendAzureRmStorageAccountName: '$(terraformStorageName)'
      backendAzureRmContainerName: '$(terraformContainerName)'
      backendAzureRmKey: '$(terraformStateFilename)'
  - task: TerraformTaskV2@2
    displayName: 'Terraform Plan'
    inputs:
      command: plan
      commandOptions: '-out=tfplan'
      environmentServiceNameAzureRM: '$(subscription)'
  - task: TerraformTaskV2@2
    displayName: 'Terraform Apply'
    inputs:
      command: apply
      commandOptions: '-auto-approve tfplan'
      environmentServiceNameAzureRM: '$(subscription)'

So, putting it all together the whole pipeline looks likes this:

trigger:
   - main
 
pr: none
parameters:
  - name: env
    displayName: 'Environment'
    type: string
    default: 'dev'
    values:
      - dev
      - test
      - prod
  - name: location
    displayName: 'Resource Location'
    type: string
    default: 'uksouth'
  - name: appName
    displayName: 'Application Name'
    type: string
    default: 'myapp'
  - name: tags 
    displayName: 'Tags'
    type: object 
    default: 
     Environment: "dev"
     Project: "Demo"
variables:
  isMain: $[eq(variables['Build.SourceBranch'], 'refs/heads/main')]
  location: 'uksouth'
  terraformGroup: 'rg-dev-terraform-uksouth'
  terraformStorageName: 'devterraformuksouth2329'
  terraformStorageSku: 'Standard_LRS'
  terraformContainerName: 'infrastructure'
  terraformStateFilename: 'deploy.tfstate'
  
jobs:
- job: infrastructure
  displayName: 'Build Infrastructure'
  pool:
    vmImage: ubuntu-latest
  container:
    image: $(containerRegistry)/iac/terraform:1.0.10_20211108.1
    endpoint: 'ACR Connection'
  steps:
  - task: AzureCLI@2
    displayName: 'Create/Update State File Storage'
    inputs:
        azureSubscription: '$(subscription)'
        scriptType: bash
        scriptLocation: inlineScript
        inlineScript: |
          az group create --location $(location) --name $(terraformGroup)
          az storage account create --name $(terraformStorageName) --resource-group $(terraformGroup) --location $(location) --sku $(terraformStorageSku) --min-tls-version TLS1_2 --https-only true --allow-blob-public-access false
          az storage container create --name $(terraformContainerName) --account-name $(terraformStorageName)
        addSpnToEnvironment: false
  - bash: |
      sed -i 's/backend "local" {}/backend "azurerm" {}/g' main.tf
    displayName: 'Update Backend in terraform file'
  - template: 'autovars.yml'
    parameters:
      env: ${{ parameters.env }}
      location: ${{ parameters.location }}
      appName: ${{ parameters.appName }}
      tags: ${{ parameters.tags }}
  - task: TerraformTaskV2@2
    displayName: 'Terraform Init'
    inputs:
      backendServiceArm: '$(subscription)'
      backendAzureRmResourceGroupName: '$(terraformGroup)'
      backendAzureRmStorageAccountName: '$(terraformStorageName)'
      backendAzureRmContainerName: '$(terraformContainerName)'
      backendAzureRmKey: '$(terraformStateFilename)'
  - task: TerraformTaskV2@2
    displayName: 'Terraform Plan'
    inputs:
      command: plan
      commandOptions: '-out=tfplan'
      environmentServiceNameAzureRM: '$(subscription)'
  - task: TerraformTaskV2@2
    displayName: 'Terraform Apply'
    inputs:
      command: apply
      commandOptions: '-auto-approve tfplan'
      environmentServiceNameAzureRM: '$(subscription)'

As with the container build pipeline I used some pipeline variables here for the subscription connection and the container registry e.g. <your registry>.azurecr.io

After the pipeline ran, a quick check in the Azure Portal shows the resources were created as expected

Final Thoughts

I really like using containers for local development and with the remote containers extension for Visual Studio Code its great to be able to run from within a container and share code in this way. I am sure that other things could be shared using this method too.

Being able to version the containers and isolate breaking changes across multiple pipelines is also a bonus. I expect this process could be better, maybe even include pinning of provider versions in Terraform, etc. but its a good start.