Snyk is a great tool for scanning your code and containers for vulnerabilities. Snyk is constantly evolving and adding new features and integrations so if you haven’t checked out the Snyk website, I highly recommend you do so. There also is a free tier for you to get started.
One of the features is Jira Integration, this allows you to create a Jira Issue from within Snyk. If you use Jira then I can see a benefit for this but what if you use Azure DevOps or you want to automate the issue creation.
This post goes though using an Azure Logic App to create an issue in Azure DevOps when a new issue is discovered (Note: the process works for Jira too, just use the Azure Logic App Jira connector).
To use the Snyk API you will need to be on the Business Plan or above (at the time of writing), this then allows the ability to add a webhook to receive events.
So the flow of the Logic App is something like this

On enable of the Logic App it will register as a webhook with your Snyk account and on disable will unregister the webhook.
Let’s build the logic app, step one create a new Logic App in Azure

Once that has been created, select a blank logic app and find the HTTP Webhook trigger

As detailed in the Snyk API Documentation set the subscribe method to POST and the URI for web hooks with your organization Id (this can be found on your Snyk account under Org Settings -> General)
Add the subscribe body that includes a secret defined by you and the url of the logic app (for the URL select the Callback Url in dynamic content)

Now set the unsubscribe method to DELETE and use an expression for the URI and leave the Body as blank
concat('https://snyk.io/api/v1/org/<your org id>/webhooks/',triggerOutputs().subscribe.body.id)

Now add new parameters for Subscribe – Headers and Unsubscribe – Headers
Authorization in both headers should be set to your API token (this can be found on your Snyk account Account Settings -> API Token)

When registering the application Snyk sends a Ping event which is determined by the X-Snyk-Event header, we really don’t want to run the rest of the workflow when this happens so we can add a condition to terminate
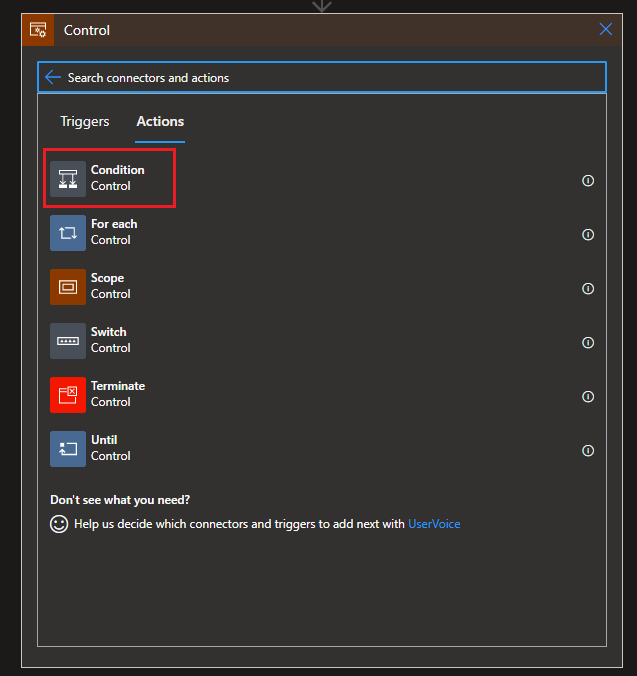
Select New Step then find Control and select it

Then select Condition
For the value use an expression to get the X-Snyk-Event header
@triggerOutputs()?['headers']?['X-Snyk-Event']
and then make the condition check it contains the word ping (the actual value is ping and the version e.g. ping/v0)

Now in the True side add an action to Terminate and Set it to Cancelled

Now if the message is anything other than a ping then we want to continue processing the response. We will want to validate that the message coming in is from Snyk and is intended for us as it will have created a signature using our custom secret and added to the header under X-Hub-Signature. To perform this validation we can use an Azure Function.
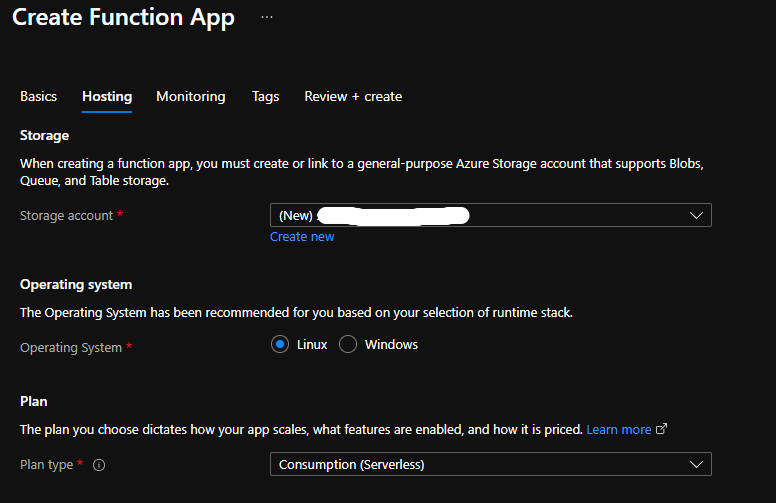
You can create an Azure Function via the Portal, I suggest you use Linux as the OS

Using Visual Studio Code with the Functions Runtime installed you can create and deploy the following function. If you are not sure how to do this take a look at the Microsoft Docs they are really helpful
I named the function ValidateRequest and used some code from the Snyk API documentation to perform the validation and return either OK (200) or Bad Request (400)
const crypto = require('crypto');
module.exports = async function (context, req) {

    context.log('JavaScript HTTP trigger function processed a request.');
    const secret = req.headers['x-logicapp-secret'];
    const hubsignature = req.headers['x-hub-signature'];
    const hmac = crypto.createHmac('sha256', secret);
    const buffer = JSON.stringify(req.body);
    hmac.update(buffer, 'utf8');
    const signature = `sha256=${hmac.digest('hex')}`;
    const isValid = signature === hubsignature;

    context.res = {
        status: isValid ? 200 : 400,
        body: isValid
    };
}
Now the Function is deployed we can add the next step to the Logic App.

Select the function app we created previously
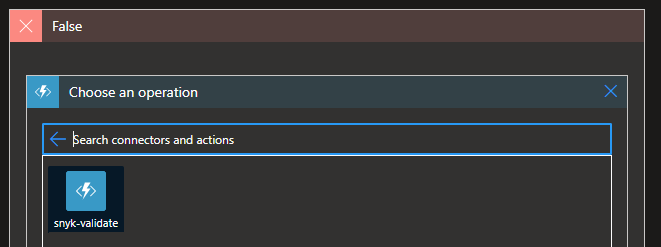
And select the function we deployed previously

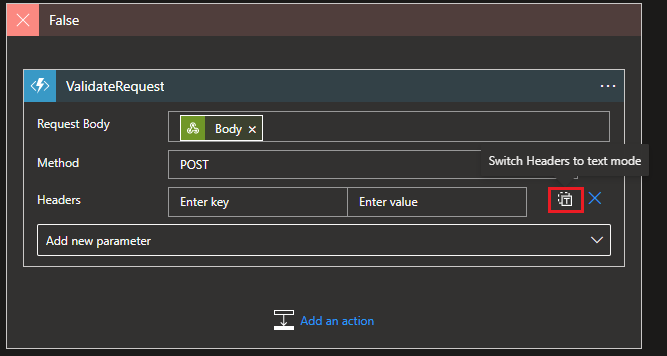
Now we need to pass the payload from the webhook into our ValidateRequest function

Add additional parameters for method and header

Set the method to POST and switch the headers to text mode
Then add the following expression to add the request headers and one with your secret
addProperty(triggerOutputs()['headers'], 'X-LogicApp-Secret', '<your secret>')

If the check is successful then the next step is to parse the json and loop through the new issues

For the Content add the payload as you did previously for the validate functionand the Schema add the following
{
    "properties": {
        "group": {
            "properties": {},
            "type": "object"
        },
        "newIssues": {
            "type": "array"
        },
        "org": {
            "properties": {},
            "type": "object"
        },
        "project": {
            "properties": {},
            "type": "object"
        },
        "removedIssues": {
            "type": "array"
        }
    },
    "type": "object"
}

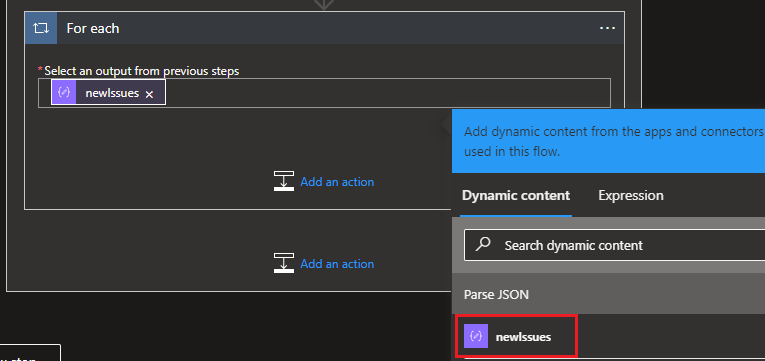
Next we need to loop through the new issues, add a new action using the control For each and add newIssues

For this I am only interested in the high severity issues so we need to add another condition using an expression for the value and is equal to high (Note: I renamed the condition to Severity)
items('For_each')?['issueData']?['severity']

Now if the severity is high then create work item using the built-in Azure DevOps connector

This will ask you to sign in

Once signed in you can set the details of the Azure DevOps organization, project and work item type
To add the details from the issue as the title and description use the following expressions
items('For_each')?['issueData']?['title']
items('For_each')?['issueData']?['description']

And that is the Logic App complete, a created work item with the title and description fields from the payload looks like this

Perhaps the formatting could do with some work but the information is there and the workflow works.
Although I used Azure DevOps as the output, there is a Jira connector that will allow creation of an issue in Jira

Once you are happy everything is running there is one last step, securing the secrets inside the logic app so they can only be seen by the designer
For the webhook select the settings and turn on Secure Inputs and Secure Outputs


and for the ValidateRequest function turn on at least Secure Inputs.
I find Azure Logic Apps a great way to connect systems together for these types of workflows because it has so many connectors.
NOTE: If you run the logic app via Run Trigger it will fail when looking for the X-Snyk-Event header. Disable and Enable the logic app to register the connection with the API
I hope it helps others integrate Snyk with their workflows and can’t wait to see what other features the API will provide in the future.
