In this post we are going to look at deploying an AKS cluster using Azure Pipelines YAML and Bicep.
If you are new to AKS then take a look at the video series AKS Zero to Hero from Richard Hooper (aka PixelRobots) and Gregor Suttie as well as the learning path from Brendan Burns.
If you are new to Pipelines and Bicep then checkout this Microsoft Learn course to give an introduction.
So, on to creating the AKS cluster using Bicep.
The resources we are going to deploy are:
- Virtual Network
- Log Analytics Workspace
- AKS Cluster
- Container Registry
We are also going to add Azure AD groups to lockdown the cluster administration and connect the container registry to allow AKS to pull containers from the registry.
Bicep
So let’s start with creating a module for the Virtual network, we need a name for the network and subnet as well as some address prefixes and tags.
@description('The virtual network name')
param vnetName string
@description('The name of the subnet')
param subnetName string
@description('The virtual network address prefixes')
param vnetAddressPrefixes array
@description('The subnet address prefix')
param subnetAddressPrefix string
@description('Tags for the resources')
param tags object

resource vnet 'Microsoft.Network/virtualNetworks@2019-11-01' = {
  name: vnetName
  location: resourceGroup().location
  properties: {
    addressSpace: {
      addressPrefixes: vnetAddressPrefixes
    }
    subnets: [
      {
        name: subnetName
        properties: {
          addressPrefix: subnetAddressPrefix
        }
      }
    ]
  }
  tags: tags
}

output subnetId string = '${vnet.id}/subnets/${subnetName}'
The next module then is the AKS cluster itself, there is a lot of settings that you might want to control but I’ve added defaults for some of them. This module also includes creation of an Log Analytics workspace and the renaming of the AKS resource group that normally is prefixed with MC_ to something inline with the used naming convention.
@description('The environment prefix of the Managed Cluster resource e.g. dev, prod, etc.')
param prefix string
@description('The name of the Managed Cluster resource')
param clusterName string
@description('Resource location')
param location string = resourceGroup().location
@description('Kubernetes version to use')
param kubernetesVersion string = '1.20.7'
@description('The VM Size to use for each node')
param nodeVmSize string
@minValue(1)
@maxValue(50)
@description('The number of nodes for the cluster.')
param nodeCount int
@maxValue(100)
@description('Max number of nodes to scale up to')
param maxNodeCount int
@description('The node pool name')
param nodePoolName string = 'linux1'
@minValue(0)
@maxValue(1023)
@description('Disk size (in GB) to provision for each of the agent pool nodes. This value ranges from 0 to 1023. Specifying 0 will apply the default disk size for that agentVMSize')
param osDiskSizeGB int
param nodeAdminUsername string
@description('Availability zones to use for the cluster nodes')
param availabilityZones array = [
  '1'
  '2'
  '3'
]
@description('Allow the cluster to auto scale to the max node count')
param enableAutoScaling bool = true
@description('SSH RSA public key for all the nodes')
@secure()
param sshPublicKey string
@description('Tags for the resources')
param tags object
@description('Log Analytics Workspace Tier')
@allowed([
  'Free'
  'Standalone'
  'PerNode'
  'PerGB2018'
  'Premium'
])
param workspaceTier string
@allowed([
  'azure'
])
@description('Network plugin used for building Kubernetes network')
param networkPlugin string = 'azure'
@description('Subnet id to use for the cluster')
param subnetId string
@description('Cluster services IP range')
param serviceCidr string = '10.0.0.0/16'
@description('DNS Service IP address')
param dnsServiceIP string = '10.0.0.10'
@description('Docker Bridge IP range')
param dockerBridgeCidr string = '172.17.0.1/16'
@description('An array of AAD group object ids for administration')
param adminGroupObjectIDs array = []

resource logAnalyticsWorkspace 'Microsoft.OperationalInsights/workspaces@2020-10-01' = {
  name: '${prefix}-oms-${clusterName}-${resourceGroup().location}'
  location: location
  properties: {
    sku: {
      name: workspaceTier
    }
  }
  tags: tags
}

resource aksCluster 'Microsoft.ContainerService/managedClusters@2021-03-01' = {
  name: '${prefix}-aks-${clusterName}-${location}'
  location: location
  identity: {
    type: 'SystemAssigned'
  }
  tags: tags
  properties: {
    nodeResourceGroup: 'rg-${prefix}-aks-nodes-${clusterName}-${location}'
    kubernetesVersion: kubernetesVersion
    dnsPrefix: '${clusterName}-dns'
    enableRBAC: true
    agentPoolProfiles: [
      {
        name: nodePoolName
        osDiskSizeGB: osDiskSizeGB
        osDiskType: 'Ephemeral'
        count: nodeCount
        enableAutoScaling: enableAutoScaling
        minCount: nodeCount
        maxCount: maxNodeCount
        vmSize: nodeVmSize
        osType: 'Linux'
        type: 'VirtualMachineScaleSets'
        mode: 'System'
        availabilityZones: availabilityZones
        enableEncryptionAtHost: true
        vnetSubnetID: subnetId
      }
    ]
    networkProfile: {
      loadBalancerSku: 'standard'
      networkPlugin: networkPlugin
      serviceCidr: serviceCidr
      dnsServiceIP: dnsServiceIP
      dockerBridgeCidr: dockerBridgeCidr
    }
    aadProfile: !empty(adminGroupObjectIDs) ? {
      managed: true
      adminGroupObjectIDs: adminGroupObjectIDs
    } : null
    addonProfiles: {
      azurepolicy: {
        enabled: false
      }
      omsAgent: {
        enabled: true
        config: {
          logAnalyticsWorkspaceResourceID: logAnalyticsWorkspace.id
        }
      }
    }
    linuxProfile: {
      adminUsername: nodeAdminUsername
      ssh: {
        publicKeys: [
          {
            keyData: sshPublicKey
          }
        ]
      }
    }
  }

  dependsOn: [
    logAnalyticsWorkspace
  ]
}

output controlPlaneFQDN string = reference('${prefix}-aks-${clusterName}-${location}').fqdn
output clusterPrincipalID string = aksCluster.properties.identityProfile.kubeletidentity.objectId
The final module is building an Azure Container Registry and assigning the ACR Pull role for the cluster
@description('The name of the container registry')
param registryName string
@description('The principal ID of the AKS cluster')
param aksPrincipalId string
@description('Tags for the resources')
param tags object

@allowed([
  'b24988ac-6180-42a0-ab88-20f7382dd24c' // Contributor
  'acdd72a7-3385-48ef-bd42-f606fba81ae7' // Reader
])
param roleAcrPull string = 'b24988ac-6180-42a0-ab88-20f7382dd24c'

resource containerRegistry 'Microsoft.ContainerRegistry/registries@2019-05-01' = {
  name: registryName
  location: resourceGroup().location
  sku: {
    name: 'Standard'
  }
  properties: {
    adminUserEnabled: true
  }
  tags: tags
}

resource assignAcrPullToAks 'Microsoft.Authorization/roleAssignments@2020-04-01-preview' = {
  name: guid(resourceGroup().id, registryName, aksPrincipalId, 'AssignAcrPullToAks')
  scope: containerRegistry
  properties: {
    description: 'Assign AcrPull role to AKS'
    principalId: aksPrincipalId
    principalType: 'ServicePrincipal'
    roleDefinitionId: '/subscriptions/${subscription().subscriptionId}/providers/Microsoft.Authorization/roleDefinitions/${roleAcrPull}'
  }
}

output name string = containerRegistry.name
So now we have the all the modules lets setup the main bicep file to put it all together
@description('Naming prefix for the resources e.g. dev, test, prod')
param prefix string
@description('The public SSH key')
@secure()
param publicsshKey string
@description('The name of the cluster')
param clusterName string
@description('The location of the resources')
param location string = resourceGroup().location
@description('The admin username for the nodes in the cluster')
param nodeAdminUsername string
@description('An array of AAD group object ids to give administrative access.')
param adminGroupObjectIDs array = []
@description('The VM size to use in the cluster')
param nodeVmSize string
@minValue(1)
@maxValue(50)
@description('The number of nodes for the cluster.')
param nodeCount int = 1
@maxValue(100)
@description('Max number of nodes to scale up to')
param maxNodeCount int = 3
@description('Disk size (in GB) to provision for each of the agent pool nodes. This value ranges from 0 to 1023. Specifying 0 will apply the default disk size for that agentVMSize')
param osDiskSizeGB int
@description('Log Analytics Workspace Tier')
@allowed([
  'Free'
  'Standalone'
  'PerNode'
  'PerGB2018'
  'Premium'
])
param workspaceTier string
@description('The virtual network address prefixes')
param vnetAddressPrefixes array
@description('The subnet address prefix')
param subnetAddressPrefix string
@description('Tags for the resources')
param tags object

module vnet 'vnet.bicep' = {
  name: 'vnetDeploy'
  params: {
    vnetName: '${prefix}-vnet-${clusterName}-${location}'
    subnetName: '${prefix}-snet-${clusterName}-${location}'
    vnetAddressPrefixes: vnetAddressPrefixes
    subnetAddressPrefix: subnetAddressPrefix
    tags: tags
  }
}

module aks 'aks.bicep' = {
  name: 'aksDeploy'
  params: {
    prefix: prefix
    clusterName: clusterName
    subnetId: vnet.outputs.subnetId
    nodeAdminUsername: nodeAdminUsername
    adminGroupObjectIDs: adminGroupObjectIDs
    nodeVmSize: nodeVmSize
    nodeCount: nodeCount
    maxNodeCount: maxNodeCount
    osDiskSizeGB: osDiskSizeGB
    sshPublicKey: publicsshKey
    workspaceTier: workspaceTier
    tags: tags
  }

  dependsOn: [
    vnet
  ]
}

module registry 'registry.bicep' = {
  name: 'registryDeploy'
  params: {
    registryName: 'acr${clusterName}'
    aksPrincipalId: aks.outputs.clusterPrincipalID
    tags: tags
  }

  dependsOn: [
    aks
  ]
}
As with ARM templates you can use a Json File to configure the parameters in bicep and so I’ve added one for this
{
    "$schema": "https://schema.management.azure.com/schemas/2019-04-01/deploymentTemplate.json#",
    "contentVersion": "1.0.0.0",
    "parameters": {
        "tags": {
            "value": {
                "project": "mjdemo",
                "resource": "AKS"
            }
        },
        "prefix": {
            "value": "dev"
        },
        "clusterName": {
            "value": "mjdemo"
        },
        "nodeVmSize": {
            "value": "Standard_D2s_V3"
        },
        "osDiskSizeGB": {
            "value": 50
        },
        "nodeCount": {
            "value": 1
        },
        "maxNodeCount": {
            "value": 3
        },
        "nodeAdminUsername": {
            "value": "aksAdminUser"
        },
        "adminGroupObjectIDs": {
            "value": []
        },
        "publicsshKey": {
            "value": ""
        },
        "workspaceTier": {
            "value": "PerGB2018"
        },
        "vnetAddressPrefixes": {
            "value": []
        },
        "subnetAddressPrefix": {
            "value": ""
        }
    }
}
Pipeline
Now we have all the Bicep files and a parameters file, we can create an Azure Pipeline but first we are going to need an SSH Key and upload it to Azure Pipelines, one way to generate an SSH key is to use the ssh-keygen command in Bash (I used Ubuntu in WSL) e.g.
ssh-keygen -q -t rsa -b 4096 -N '' -f aksKey
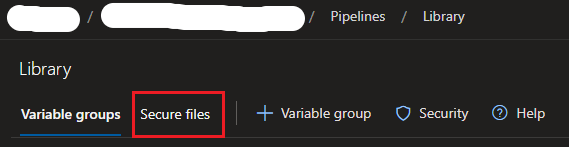
This will generate a private and public key pair, you can then upload the public key file e.g. aksKey.pub to Secure Files in Azure DevOps Pipelines (Pipelines->Library->Secure files)
We are going to add Azure AD Groups in this deployment and will need to assign the role ‘Azure Kubernetes Service Cluster User Role’ to each group, the Microsoft Docs detail how to do this.
Now we have the SSH key uploaded we can configure the parameters we want to set for our AKS cluster and network.
trigger: none
pr: none

pool:
  vmImage: ubuntu-latest

parameters:
  - name: azureSubscription
    type: string
    default: 'Sandbox'
  - name: location
    displayName: 'Resource Location'
    type: string
    default: 'uksouth'
  - name: prefix
    displayName: 'Environment Prefix'
    type: string
    default: 'prod'
  - name: clusterName
    displayName: 'Name of the AKS Cluster'
    type: string
    default: 'demo'
  - name: nodeVmSize
    displayName: 'VM Size for the Nodes'
    type: string
    default: 'Standard_D2s_V3'
    values:
      - 'Standard_D2s_V3'
      - 'Standard_DS2_v2'
      - 'Standard_D4s_V3'
      - 'Standard_DS3_v2'
      - 'Standard_DS4_v2'
      - 'Standard_D8s_v3'
  - name: osDiskSizeGB
    displayName: 'Size of OS disk (0 means use vm size)'
    type: number
    default: 50
  - name: nodeCount
    displayName: 'The number of nodes'
    type: number
    default: 3
  - name: maxNodeCount
    displayName: 'Max node to scale out to'
    type: number
    default: 10
  - name: workspaceTier
    displayName: Log Analytics Workspace Tier
    type: string
    default: 'PerGB2018'
    values:
      - 'Free'
      - 'Standalone'
      - 'PerNode'
      - 'PerGB2018'
      - 'Premium'
  - name: tags
    displayName: 'Tags'
    type: object
    default:
     Environment: "prod"
     Resource: "AKS"
     Project: "Demo"
  - name: nodeAdminUsername
    displayName: 'Admin username for the nodes'
    type: string
    default: 'adminUserName'
  - name: vnetAddressPrefixes
    displayName: 'Virtual Network Address Prefixes'
    type: object
    default:
      - '10.240.0.0/16'
  - name: subnetAddressPrefix
    displayName: 'Subnet Address Prefix'
    type: string
    default: '10.240.0.0/20'
  - name: adGroupNames
    type: object
    default:
      - 'demo-group'

variables:
  resourceGroupName: 'rg-${{ parameters.prefix }}-${{ parameters.clusterName }}-${{ parameters.location }}'
With the parameters set the next part is to build up the steps, starting with downloading the SSH key from the secure files using the DownloadSecureFile task
steps:
- task: DownloadSecureFile@1
  displayName: 'Download Public SSH Key'
  name: SSHfile
  inputs:
    secureFile: 'aksKey.pub'
- bash: |
    value=`cat $(SSHfile.secureFilePath)`
    echo '##vso[task.setvariable variable=publicsshKey;issecret=true]'$value
  displayName: Obtain SSH key value
Next we can get the object IDs for the groups
- task: AzureCLI@2
  displayName: 'Get AD Group Object Ids'
  inputs:
    azureSubscription: ${{ parameters.azureSubscription }}
    scriptType: pscore
    scriptLocation: inlineScript
    inlineScript: |
      $objectIds = '${{ join(',',parameters.adGroupNames) }}'.Split(',') | ForEach {
        "$(az ad group list --query "[?displayName == '$_'].{objectId:objectId}" -o tsv)"
      }

      $output = ConvertTo-Json -Compress @($objectIds)
      Write-Host '##vso[task.setvariable variable=groupIds]'$output
This next section is taking those parameters and turning them into variables to then substitute the values in parameters json file
- template: objectparameters.yml
  parameters:
    tags: ${{ parameters.tags }}
    vnetAddressPrefixes: ${{ parameters.vnetAddressPrefixes }}
- template: parameters.yml
  parameters:
    prefix: ${{ parameters.prefix }}
    clusterName: ${{ parameters.clusterName }}
    nodeVmSize: ${{ parameters.nodeVmSize }}
    osDiskSizeGB: ${{ parameters.osDiskSizeGB }}
    nodeCount: ${{ parameters.nodeCount }}
    maxNodeCount: ${{ parameters.maxNodeCount }}
    nodeAdminUsername: ${{ parameters.nodeAdminUsername }}
    publicsshKey: $(publicsshKey)
    workspaceTier: ${{ parameters.workspaceTier }}
    subnetAddressPrefix: ${{ parameters.subnetAddressPrefix }}
    adminGroupObjectIDs: $(groupIds)
- task: FileTransform@2
  displayName: "Transform Parameters"
  inputs:
    folderPath: '$(System.DefaultWorkingDirectory)'
    xmlTransformationRules: ''
    jsonTargetFiles: 'deploy.parameters.json'
If you need to debug the transform then you can add another step to output the file contents, I find this a useful technique to make sure the transform worked as expected
- bash: |
    cat deploy.parameters.json
  displayName: "Debug show parameters file"
If we put all that together then the final pipeline looks like this:
trigger: none
pr: none

pool:
  vmImage: ubuntu-latest

parameters:
  - name: azureSubscription
    type: string
    default: 'Sandbox'
  - name: location
    displayName: 'Resource Location'
    type: string
    default: 'uksouth'
  - name: prefix
    displayName: 'Environment Prefix'
    type: string
    default: 'prod'
  - name: clusterName
    displayName: 'Name of the AKS Cluster'
    type: string
    default: 'demo'
  - name: nodeVmSize
    displayName: 'VM Size for the Nodes'
    type: string
    default: 'Standard_D2s_V3'
    values:
      - 'Standard_D2s_V3'
      - 'Standard_DS2_v2'
      - 'Standard_D4s_V3'
      - 'Standard_DS3_v2'
      - 'Standard_DS4_v2'
      - 'Standard_D8s_v3'
  - name: osDiskSizeGB
    displayName: 'Size of OS disk (0 means use vm cache size)'
    type: number
    default: 50
  - name: nodeCount
    displayName: 'The number of nodes'
    type: number
    default: 3
  - name: maxNodeCount
    displayName: 'Max node to scale out to'
    type: number
    default: 10
  - name: workspaceTier
    displayName: Log Analytics Workspace Tier
    type: string
    default: 'PerGB2018'
    values:
      - 'Free'
      - 'Standalone'
      - 'PerNode'
      - 'PerGB2018'
      - 'Premium'
  - name: tags
    displayName: 'Tags'
    type: object
    default:
     Environment: "prod"
     Resource: "AKS"
     Project: "Demo"
  - name: nodeAdminUsername
    displayName: 'Admin username for the nodes'
    type: string
    default: 'adminUserName'
  - name: vnetAddressPrefixes
    displayName: 'Virtual Network Address Prefixes'
    type: object
    default:
      - '10.240.0.0/16'
  - name: subnetAddressPrefix
    displayName: 'Subnet Address Prefix'
    type: string
    default: '10.240.0.0/20'
  - name: adGroupNames
    type: object
    default:
      - 'demo-group'

variables:
  resourceGroupName: 'rg-${{ parameters.prefix }}-${{ parameters.clusterName }}-${{ parameters.location }}'

steps:
- task: DownloadSecureFile@1
  displayName: 'Download Public SSH Key'
  name: SSHfile
  inputs:
    secureFile: 'aksKey.pub'
- bash: |
    value=`cat $(SSHfile.secureFilePath)`
    echo '##vso[task.setvariable variable=publicsshKey;issecret=true]'$value
  displayName: Obtain SSH key value
- task: AzureCLI@2
  displayName: 'Get AD Group Object Ids'
  inputs:
    azureSubscription: ${{ parameters.azureSubscription }}
    scriptType: pscore
    scriptLocation: inlineScript
    inlineScript: |
      $objectIds = '${{ join(',',parameters.adGroupNames) }}'.Split(',') | ForEach {
        "$(az ad group list --query "[?displayName == '$_'].{objectId:objectId}" -o tsv)"
      }

      $output = ConvertTo-Json -Compress @($objectIds)
      Write-Host '##vso[task.setvariable variable=groupIds]'$output
- template: objectparameters.yml
  parameters:
    tags: ${{ parameters.tags }}
    vnetAddressPrefixes: ${{ parameters.vnetAddressPrefixes }}
- template: parameters.yml
  parameters:
    prefix: ${{ parameters.prefix }}
    clusterName: ${{ parameters.clusterName }}
    nodeVmSize: ${{ parameters.nodeVmSize }}
    osDiskSizeGB: ${{ parameters.osDiskSizeGB }}
    nodeCount: ${{ parameters.nodeCount }}
    maxNodeCount: ${{ parameters.maxNodeCount }}
    nodeAdminUsername: ${{ parameters.nodeAdminUsername }}
    publicsshKey: $(publicsshKey)
    workspaceTier: ${{ parameters.workspaceTier }}
    subnetAddressPrefix: ${{ parameters.subnetAddressPrefix }}
    adminGroupObjectIDs: $(groupIds)
- task: FileTransform@2
  displayName: "Transform Parameters"
  inputs:
    folderPath: '$(System.DefaultWorkingDirectory)'
    xmlTransformationRules: ''
    jsonTargetFiles: 'deploy.parameters.json'
- task: AzureCLI@2
  displayName: 'Deploy AKS Cluster'
  inputs:
    azureSubscription: ${{ parameters.azureSubscription }}
    scriptType: bash
    scriptLocation: inlineScript
    inlineScript: |
      az group create --name "$(resourceGroupName)" --location ${{ parameters.location }}
      az deployment group create --name "${{ parameters.clusterName }}-deploy" --resource-group "$(resourceGroupName)" --template-file deploy.bicep --parameters deploy.parameters.json
The template file objectparameters.yml looks like this:
parameters:
  - name: tags
    type: object
  - name: vnetAddressPrefixes
    type: object

steps:
- ${{ each item in parameters }}:
  - bash: |
      value='${{ convertToJson(item.value) }}'
      echo '##vso[task.setvariable variable=parameters.${{ item.key }}.value]'$value
    displayName: "Create Variable ${{ item.key }}"
And the template file parameters.yml looks like this:
parameters:
  - name: prefix
    type: string
  - name: clusterName
    type: string
  - name: nodeVmSize
    type: string
  - name: osDiskSizeGB
    type: number
  - name: nodeCount
    type: number
  - name: maxNodeCount
    type: number
  - name: nodeAdminUsername
    type: string
  - name: publicsshKey
    type: string
  - name: workspaceTier
    type: string
  - name: subnetAddressPrefix
    type: string
  - name: adminGroupObjectIDs
    type: string

steps:
- ${{ each item in parameters }}:
    - bash: |
        echo '##vso[task.setvariable variable=parameters.${{ item.key }}.value]${{ item.value }}'
      displayName: "Create Variable ${{ item.key }}"
Now we have an AKS cluster setup we might want to deploy some applications to the cluster. CoderDave has a great video tutorial to do this with Azure Pipelines.
All the files shown above can be found on my GitHub